COURSE: PHOTOGRAPHY 6468 Credit: .5
TEACHER: Mr. Jacobson-Hardy
MEETS: This is a semester course meeting on alternate days
TEXTBOOK: PHOTOGRAPHY, Upton-London
Students in this course will explore the history and practice of photography.They will sharpen their critical thinking about photography by learning how it has both reflected and influenced our culture for the last hundred years. Students will begin with a study of the history of photography and its practice. They will become familiar with the work of well-known photographers and the contexts in which they worked. They will learn how to compose, sequence, edit, and present their photographs. Assessments will include critiques in class, and the production of three portfolios. Students will learn about studio lighting, portraiture, landscapes, tabletop photography, advertising photography, photomontage, and the use of Photoshop. Participants will also learn about cityscapes, architectural photography, and documentary photography, and will make a photo essay. Lessons will be given on camera functions including aperture and timer controls and settings. Students will learn how to manage their images and store them on the classroom server. They will produce their own slide shows to be broadcast on school televisions.
COURSE OUTLINE
- An introduction to photography
- The history of photography
- The digital camera and how it works
- Pixels and image management
- Image management and classroom storage and workflow
- An introduction to Photoshop
- Portraiture and lighting technique
- Landscapes
- Tabletop photography and Photoshop
- Advertising photography and Photoshop
- Making CD and Magazine Covers
- Photo Montage and Photoshop
- Studio photography
- Cityscapes
- Architectural photography
- Documentary photography
- The photo essay and photo literacy
GRADING POLICY:
- Students receive verbal instruction, watch examples & demonstrations for all new techniques. They also receive specific written instructions, which include the rubrics for grading each project. Grades for each project are based on the rubrics and requirements for that project.
- Grades are also determined by participation in class, classroom behavior, respect for each other, and for classroom rules. The quality of student productions and the ability to collaborate are also considered in grading.
- Grades are also based on organization and study/work skills, understanding of the concepts and ability to use the technology.
- Student self-assessment forms will be filled out to help determine your performance.
INTRODUCTION TO PHOTOGRAPHY
Photography and audio/video production are tools that we use to help train our minds to see in unique and creative ways. The digital classroom provides a working environment that enhances your students’ ability to learn and express their ideas.
Students need to understand this rapidly advancing technology and know how to best use it in order to keep up with and communicate in our rapidly changing world. This is why the teaching of multimedia production, including photography is so important in schools today.
We need to offer our students the tools they need to express themselves creatively. Audio, video, and still photographic images are used to communicate in today’s multimedia world. No longer are the lines drawn between different kinds of image making. Pick up a digital camera and notice that you now can record audio, video, and still images. The digital revolution has taken over the ways we create media.
Students, with the help of their teachers, can upload text, images, and videos to their school’s Web site. Today, students may share their work widely providing immediate gratification for a job well done.
Finally visual literacy is a powerful tool. Students in my classes are required to write about their work and the images they make. They use visual images to inform their writing as well. There is no limit to the uses of this technology.
This guide was written in order to advance our understanding of how to teach these tools to young people. It begins with an introduction to still photography, and moves on to the use and development of moving images and sound that forms the basis of audio/video production. Several exercises and examples plus lesson plans help both students and teachers explore various media. This is in a sense, a multimedia guide to teaching the communication skills necessary to keep up with and contribute effectively in today’s rapidly changing world.
This guide was designed to teach a broad range of students. There are exercises for students of all ages but mainly the focus is on 5th – 12th graders. It utilizes the latest technology to create a workflow for today’s modern digital classroom. It features the design and development of a digital work environment that includes the printing of photographs, as well as the display of videos or photos on television monitors located throughout your school.

THE HISTORY OF PHOTOGRAPHY
We begin with the invention of the still camera.
Early on cave dwellers noticed an interesting phenomenon.You can see the same thing they saw by spending some time in a cave yourself. Light entered a small opening in the cave entrance and made an upside down image on the cave wall.
They must have been amazed and maybe even fearful of this image. Where did it come from? The light on the wall they saw was what led to the invention of photography years later. It was perhaps the first picture ever seen. An image was made from the light piercing the tiny opening of the cave wall. If the size of the hole was decreased, the image became sharper.
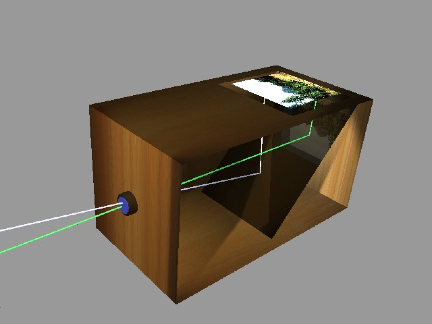
During the Renaissance these same properties of light were used to make the camera obscura, a box that was light tight with a small hole on one side to let light in. Much like the darkened cave that let the light of the sun pierce its walls and reflect on the cave surface, the camera obscura used a light tight box with a hole on one side. All that was needed was a way to "fix" the image onto a substance that would record it as a photograph.
Picture in your minds the following opening scene:
William Henry Fox Talbot traces a scene at Lake Como with the help of a camera obscura. He begins to wonder “if it were possible to cause these natural images to imprint themselves durably.” By 1839 he has perfected the art of chemically fixing a shadow. He announces to the Royal Society his invention of a way to record images permanently on specially treated paper “by the agency of light alone, without any aid whatever from the artist’s pencil.” Simultaneously, Daguerreotypes make their public appearance in France. The history painter Paul Delarouche exclaims, “From this day on, painting is dead.”
The camera obscura (Latin for ‘dark room’; literally ‘darkened chamber’) is an optical device that projects an image of its surroundings on a screen. It is used in drawing and for entertainment, and was one of the inventions that led to photography. The device consists of a box or room with a hole in one side. Light from an external scene passes through the hole and strikes a surface inside where it is reproduced, upside-down, but with color and perspective preserved. The image can be projected onto paper, and can then be traced to produce a highly accurate representation.
Using mirrors, as in the 18th century overhead version (illustrated in the Discovery and Origins section below), it is possible to project a right-side-up image. Another more portable type is a box with an angled mirror projecting onto tracing paper placed on the glass top, the image being upright as viewed from the back.
As a pinhole is made smaller, the image gets sharper, but the projected image becomes dimmer. With too small a pinhole the sharpness again becomes worse due to diffraction. Some practical camera obscuras use a lens rather than a pinhole because it allows a larger aperture, giving a usable brightness while maintaining focus. (See pinhole camera for construction information.)
This was the beginning of photography.
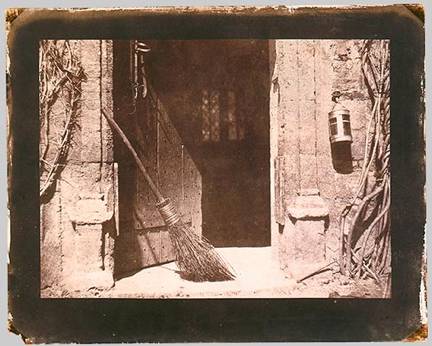
The Open Door, 1844
William Henry Fox Talbot (British, 1800–1877)
Among the most widely admired of Talbot's compositions, The Open Door is a conscious attempt to create a photographic image in accord with the renewed British taste for Dutch genre painting of the seventeenth century. In his commentary in The Pencil of Nature, where this image appeared as plate 6, Talbot wrote, "We have sufficient authority in the Dutch school of art, for taking as subjects of representation scenes of daily and familiar occurrence. A painter's eye will often be arrested where ordinary people see nothing remarkable." With this concept in mind, Talbot turned away from the historic buildings of Lacock Abbey and focused instead on the old stone doorframe and simple wooden door of the stable and on the humble broom, harness, and lantern as vehicles for an essay on light and shadow, interior and exterior, form and texture.
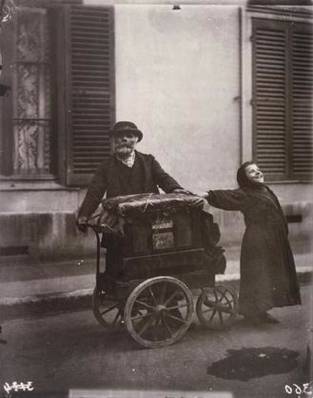
Eugène Atget
PHOTOGRAPHY EXERCISES:
Objectives: The following assignment will help students learn about the history of photography while introducing them to their classroom textbook..
THE HISTORY OF PHOTOGRAPHY
Read pages 367-373 in PHOTOGRAPHY and answer the following questions on a separate sheet of paper. Hand in your answer sheet when you’re finished. Be sure to put your name, date, and class period on the top of your work.
The Invention of Photography
During what century was photography invented?
Why did photography take over as an art form?
What was the forerunner of the modern camera?
How did it work?
How long did it take to expose the first photograph?
Who were Niépce and Daguerre?
When was the photograph on page 369 of Emily Dickenson made?
What was the primary metal used to react to light in the daguerreotype?
Who was William Henry Fox Talbot?
What was the significance of 1839?
What was silver iodide used for and what invention did it result in? (Begins with a C)
What is the significance of the collodion wet-plate process?
What was its drawback?
What was the new invention that allowed more people to make photographs?
Explain the new gelatin emulsion. What chemicals did it consist of?
What kind of film revolutionized photography?
Who first popularized photography?
When did George Eastman introduce the Kodak camera?
How did color photography come about?
What were the colors of the filters used to create the first color image?
Who were the Lumiere brothers and what did they do?
What is Kodachrome and when was it first introduced?
Objectives: The following exercise will introduce students to work done by professional photographers. It will also teach them how to do photo research and how to use iPhoto to make their first slideshow.
PHOTO RESEARCH PROJECT
The following exercise is used to help familiarize students with historical images made by important influential photographers. It also will show students how to work with the application program iPhoto, and how to begin to edit and alter their images.
Photo Research Project: http://images.google.com/
Make a folder with your full name on it on the desktop of your computer by going to File and selecting New Folder in the drop-down menu.
Below is a list of names of important photographers. Do a “Google” photo search online for their work. Familiarize yourself with all of the following photographers’ work.
Make a photo presentation. Be sure to select LARGE size images. Drag at least 20 pictures that you like into your desktop folder. BE SELECTIVE AND BE SURE TO CHOOSE LARGE SIZE IMAGES FOR QUALITY REPRODUCTIONS.
You will now learn to use iPhoto and will ultimately make a slideshow of the photographs in your desktop folder.
- Select and open iPhoto by double clicking on the icon at the bottom of the screen.
- Create an album for you photographs by pressing the plus button at the bottom of the iPhoto window. Type your name where it says “untitled album.”
- Next, drag the folder you have made on the desktop of your computer into the empty box that opens up in iPhoto.
Now comes the fun!
Select one of your photos and press the edit button at the bottom of the box and experiment with editing your images in iPhoto. You should experiment with the various options for altering your images. Try choosing different shades of grey, sepia tones, and other possibilities. Adjust the color and contrast of your images. Do this with all of your pictures.
Next, select all of the photos by pressing the “Select all” button in the “Edit” menu. Push the slideshow button at the bottom of the page. A slideshow of your work will appear in the iPhoto directory column. Click on the arrow at the bottom of the screen to view your slideshow.
Select “File” at the top of your screen. Choose “Export” and export your slideshow as a Quicktime movie file. Be sure to choose the desktop and name your movie with your full name. If you are having trouble exporting your file to the desktop, you may have to reduce the quality to small file size.
List of Photographers to choose from:
Walker Evans Ansel Adams W. Eugene Smith
Edward Weston Gordon Parks Roman Vishniac
Paul Strand Imogen Cunningham Henri Cartier-Bresson
Robert Frank
VISUAL LITERACY
Objectives: The following terms help students learn to use a language to talk about pictures, much as we learn a language to express our ideas and thoughts.
TERMS FOR TALKING ABOUT PHOTOGRAPHS
We need to have a shared language when we speak about pictures. Let’s become familiar with the following descriptive art terms and begin to use them in a sentence about the photograph you chose. For example, “I like the composition in this picture. The foreground is bigger than the background.”
Select a photograph or two from your classroom textbook and tell us what you like or dislike about it using one or more of the following terms.
Descriptive Terms:
Students must be fluent in the language or art and photography in order to be able to communicate important ideas. Go over the following glossary of terms in order to communicate important concepts.
(One way to help students learn about these is to have them memorize them with friends. Scramble them up and see if they can match words with meanings.)
Abstract A form that has been simplified or taken from a large image or scene.
Background The part of a photograph or painting that appears to be farthest away from the viewer.
Composition The arrangement of art elements in a work of art.
Cityscape A work of art in which the city is the predominant subject.
Cloudscape A work of art in which clouds predominate the scene.
Foreground The part of a painting or photograph that appears to be closest to the viewer.
Geometric Shapes or forms that are regular and precise—squares, circles, triangles, rectangles, cones, cubes, spheres, pyramids, cylinders, etc.
Landscape A work of art in which the features of the land (desert, mountains, trees, forest) are the predominant subject.
Pattern A design made by repeating a motif at regular intervals
Point of view The angle from which the viewer sees an object from a front, back, side, top (bird’s eye), bottom or three-quarter point of view.
Portrait A photograph or painting of a particular person.
Primary colors the hues from which all other colors on the color wheel can be made: red, yellow and blue.
Secondary colors Hues made by mixing equal amounts of two primary colors: orange, green and violet.
Shade Any dark value of a color, usually achieved by adding black.
Silhouette An outline drawing filled in with a single color; any dark shape or outline seen against a light background
Skyscape A work of art in which the sky is the predominant subject
Still life An arrangement of inanimate objects as s subject for painting, drawing, or photographing.
Symmetry The placement of the same elements on either side of a diving line in such a way that they form a mirror image of each other; this arrangement results in formal or symmetrical balance.
Texture The quality of a surface, usually characterized by its roughness or smoothness. Texture can refer to both the visual and tactile quality of a surface.
Viewpoint the angle from which the viewer sees an object or scene; the position of the artist when creating a work of art.
Reflections - Pictures of glass, mirrors or other surfaces that show
reflections.
Fragments - Pictures that only show part of an object, not the whole
thing.
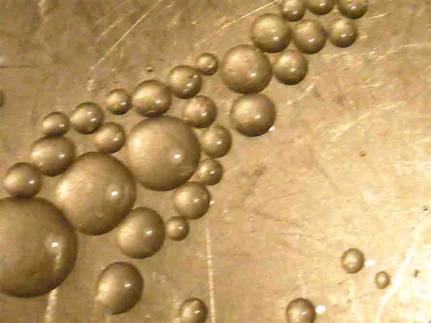
Abstraction - Photographs which represent reality mainly as patterns
and/or shapes and not as recognizable objects.
Pattern - The repetition of lines or forms in an arranged sequence.
Take pictures of patterns in and around the school.
Texture - The surface characteristics of an object such as: smooth or rough, soft or hard or, shiny or dull.
Take pictures that emphasize the texture of an object or objects.
Objectives: The following exercise helps students talk about what they like about pictures.
THREE THINGS I LIKE
Go to:
http://museums.fivecolleges.edu/
or
http://digitalgallery.nypl.org/nypldigital/index.cfm
Type in these names of important photographers.
Select three of your favorite pictures from each of the following photographers, and turn to your neighbors and tell them three things that you like about your favorite pictures.
Photographers include:
Robert Adams
Diane Arbus
Eugent Atget
Richard Avedon
Harry Callahan
Walker Evans
Lee Friedlander
Adam Fuss
Helen Levitt
Sol LeWitt
Ralph Eugene Meatyard
Nicholas Nixon
Irving Penn
August Sander
Edward Weston
Garry Winogrand
Michael Jacobson-Hardy
Jerome Liebling
Objectives: The following exercise helps students learn the meaning of pictures as each tells a story.
Be sure to answer the following questions on a separate sheet of paper and hand them in.
Look at the following photograph. Can you tell us something about it?
1. What do you see as the theme—the universal message—in this picture?
2. How did the photographer focus attention on the main subject?
3. What did the photographer do—and not do—to simplify this picture?
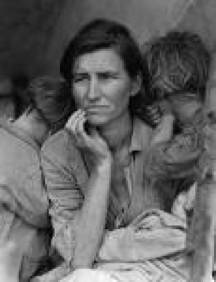
The name of the photograph is Migrant Mother, by Dorothea Lange
What do you think she is thinking about? Is she happy or sad? Does she seem pensive?
Go online and search for Migrant Mother by Dorothea Lange. What can you learn online about Dorothea Lange and this photograph?
Answer (share with class and have them do the same with five found images):
The photograph that has become known as “Migrant Mother” is one of a series of photographs that Dorothea Lange made of Florence Owens Thompson and her children in February or March of 1936 in Nipomo, California. Lange was concluding a month’s trip photographing migratory farm labor around the state for what was then the Resettlement Administration. In 1960, Lange gave this account of the experience:
I saw and approached the hungry and desperate mother, as if drawn by a magnet. I do not remember how I explained my presence or my camera to her, but I do remember she asked me no questions. I made five exposures, working closer and closer from the same direction. I did not ask her name or her history. She told me her age, that she was thirty-two. She said that they had been living on frozen vegetables from the surrounding fields, and birds that the children killed. She had just sold the tires from her car to buy food. There she sat in that lean- to tent with her children huddled around her, and seemed to know that my pictures might help her, and so she helped me. There was a sort of equality about it. (From: Popular Photography, Feb. 1960).
Answer the following questions on a separate piece of paper:
1. What do you see as the theme—the universal message—in this picture?
2. How did the photographer focus attention on the main subject?
3. What did the photographer do—and not do—to simplify this picture?
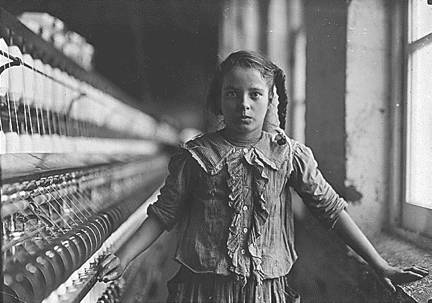
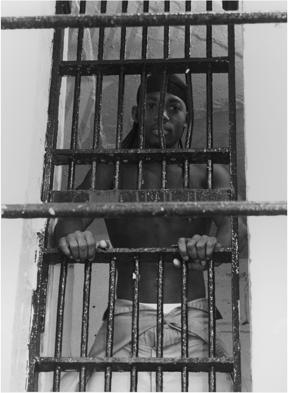
Lewis W. Hine
Answer the following questions on a separate piece of paper:
1. What do you see as the theme—the universal message—in this picture?
2. How did the photographer focus attention on the main subject?
3. What did the photographer do—and not do—to simplify this picture?
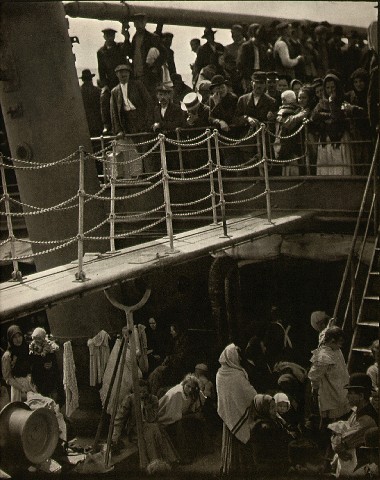
The Steerage, 1907, Alfred Stieglitz
The Steerage, 1907
Alfred Stieglitz (American, 1864–1946)
Photogravure on vellum
12 11/16 x 10 3/16 in. (32.2 x 25.8 cm)
Alfred Stieglitz Collection, 1933 (33.43.419)
As proprietor of the Little Galleries of the Photo-Secession and publisher of the photographic journals Camera Notes and Camera Work, Alfred Stieglitz was a major force in the promotion and elevation of photography as a fine art in America in the late nineteenth and early twentieth centuries. The Steerage is considered Stieglitz’s signature work, and was proclaimed by the artist and illustrated in histories of the medium as his first “modernist” photograph. It marks Stieglitz’s transition away from painterly prints of Symbolist subjects to a more straightforward depiction of quotidian life.
The Steerage began its life as a masterpiece four years after its creation, with Stieglitz’s publication of it in a 1911 issue of Camera Work devoted exclusively to his photographs in the “new” style, together with a Cubist drawing by Picasso. Stieglitz loved to recount how the great painter had praised the collagelike dispersal of forms and shifting depths of The Steerage. Canonized retroactively, the photograph allowed Stieglitz to put his chosen medium on par with the experimental European painting and sculpture he imported and exhibited so presciently at his gallery. In 1915, he lavishly reprinted the image in large-scale photogravure on both vellum and japanese paper for inclusion in his last magazine, 291.
Answer the following questions on a separate piece of paper:
1. What do you see as the theme—the universal message—in this picture?
2. How did the photographer focus attention on the main subject?
3. What did the photographer do—and not do—to simplify this picture?
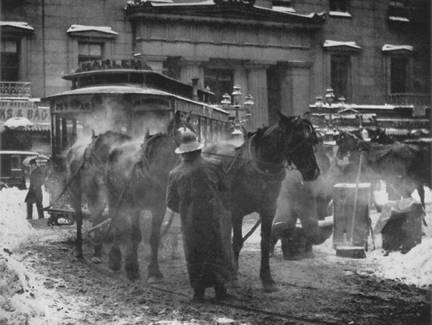
The Terminal, New York, 1892, Alfred Stieglitz
The Terminal, 1892
Alfred Stieglitz (American, 1864–1946)
Photogravure
4 3/4 x 6 5/16 in. (12.1 x 16 cm)
Gift of J. B. Neumann, 1958 (58.577.11)
As proprietor of the Little Galleries of the Photo-Secession and publisher of the photographic journals Camera Notes and later Camera Work, Stieglitz was a major force in the promotion and elevation of photography as a fine art in America in the late nineteenth and early twentieth centuries. His own photographs had an equally revolutionary impact on the advancement of the medium.
Stieglitz took this picture using a small 4 x 5 camera, an instrument not considered at the time to be worthy of artistic photography. Unlike the unwieldy 8 x 10 view camera (which required a tripod), this camera gave Stieglitz greater freedom and mobility to roam the city and respond quickly to the ever-changing street life around him. The Terminal predicts by over a decade the radical transformation of the medium from painterly prints of rarified subjects to what the critic Sadakichi Hartmann dubbed “straight photography.” This new photography would take as its subject matter the quotidian aspects of modern urban life, using only techniques that are unique to the medium. At the same time, in this and other photographs he made around the turn of the century, Stieglitz used natural elements such as smoke, rain, and snow to soften and unify the image into a pictorially pleasing synthesis.
Answer the following questions on a separate piece of paper:
1. What do you see as the theme—the universal message—in this picture?
2. How did the photographer focus attention on the main subject?
3. What did the photographer do—and not do—to simplify this picture?
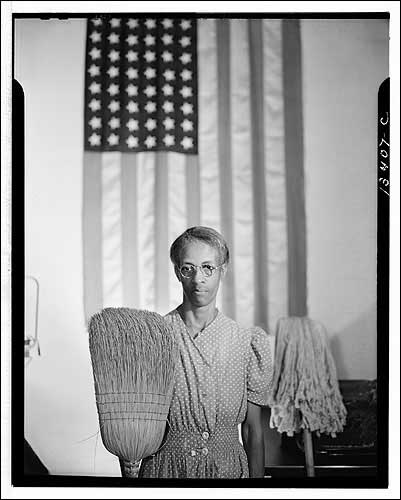
Gordon Parks, Charwoman, Farm Security Administration, Washington, DC
Ella Watson, who worked as a charwoman in a federal building in Washington, D.C., posed for Gordon Parks in 1948 with a mop and broom, symbols of her trade. The photograph is now known as “Gordon Parks American Gothic.”
Answer the following questions on a separate piece of paper:
1. What do you see as the theme—the universal message—in this picture?
2. How did the photographer focus attention on the main subject?
3. What did the photographer do—and not do—to simplify this picture?
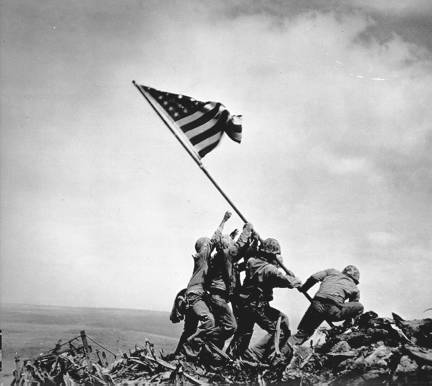
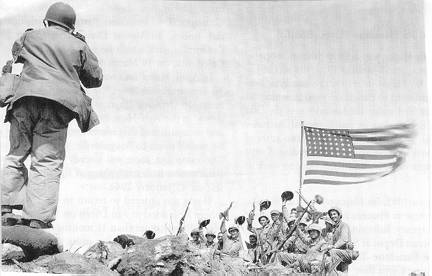
The Battle of Iwo Jima (February 19 – March 26, 1945), or Operation Detachment, was a battle in which the United States fought for and captured Iwo Jima from Japan. The battle produced some of the fiercest fighting in the Pacific Campaign of World War II.
The battle was immortalized by Joe Rosenthal‘s photograph of the raising of the U.S. flag on top of the 166 m (540 ft) Mount Suribachi by five Marines and one Navy Corpsman. The photograph records the second flag-raising on the mountain, which took place on the fifth day of the 35-day battle. The picture became the iconic image of the battle and has been heavily reproduced.[6]
Answer the following questions on a separate piece of paper:
1. What do you see as the theme—the universal message—in this picture?
2. How did the photographer focus attention on the main subject?
3. What did the photographer do—and not do—to simplify this picture?
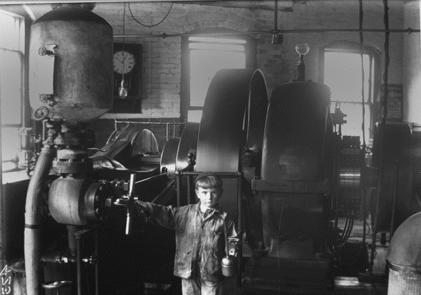
Boy working at 30 North Maple Street,
Florence, MA (Photographer unknown)
Answer the following questions on a separate piece of paper:
1. What do you see as the theme—the universal message—in this picture?
2. How did the photographer focus attention on the main subject?
3. What did the photographer do—and not do—to simplify this picture?
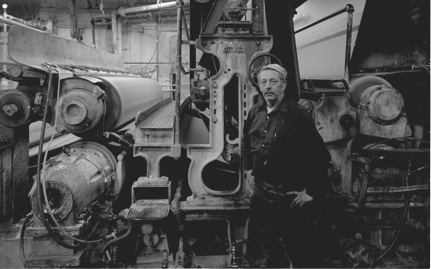
Rudy Piotrowski making paper at Linweave Paper Company, Holyoke, MA
Michael Jacobson-Hardy, 1991
Answer the following questions on a separate piece of paper:
1. What do you see as the theme—the universal message—in this picture?
2. How did the photographer focus attention on the main subject?
3. What did the photographer do—and not do—to simplify this picture?
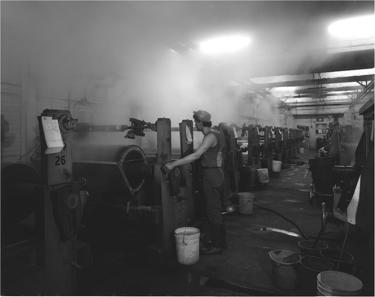
Worker in a Dye House, Holyoke, MA, Michael Jacobson-Hardy
Answer the following questions on a separate piece of paper:
1. What do you see as the theme—the universal message—in this picture?
2. How did the photographer focus attention on the main subject?
3. What did the photographer do—and not do—to simplify this picture?
Objectives: This exercise helps students become familiar with software editing tools before they begin to take pictures. They will also learn how to do photo research online using search tools. It also helps students think about the kinds of images that interests them and may inform their later work.
IMAGES TO MUSIC
This assignment will get you familiar with using iPhoto, but it will not require you to use a camera.
1) Get together with your group and come up with a theme for your slide show.
2) Think about possible still images or photos that illustrate the theme you’ve developed with your group.
3) Go on line and, using Google, find at least 20 images that you think are a good match for your theme.
4) Be sure to choose the full-sized version of each image, not the thumbnail version.
5) Save each image in a folder with your name on it as a jpeg file on the desktop of your computer.
6) Open iPhoto, create an album using the + button and type in your name.
7) Drag & drop each of your still images into the album you created on your iPhoto screen.
8) Now choose a song or piece of music that goes well with your theme & the images you selected.
(The music must be imported into iTunes before you can import it into your movie.)
9) Import your music from iTunes into your slideshow.
10) Select all photos in your album and click on the slideshow button. Now you may view your slideshow by clicking on the play button.
Grading:
Originality…………………………………………….....….10%
Good choice of theme………………………………………25%
Good choice of images……………………………………..25%
Good choice of music………………………………………25%
Good continuity of theme, images, and music choices….……15%
How to get music off the Internet:
Search Youtube to mp3
Choose one of the websites towards the top
Open another window and go to Youtube.com
Search on Youtube for the song you want
Copy the URL at the top and paste it into the space provided on the Youtube to mp3 website
Click connect
Your music should appear in iTunes
THE DIGITAL CAMERA
MAKING PICTURES
Objectives: It is important for students to learn how cameras work before using them. The following exercise helps to familiarize students with the classroom digital cameras plus helps them begin to learn how to take pictures and store them onto the hard drives of their computers.
Begin by going over camera basics including:
- Cameras are very expensive tools. Treat them with care.
- On/off button
- These are auto-focus cameras
- Use the green auto-function setting initially to control exposures and aperture settings
- The camera zoom control
- Rechargeable batteries and their care and use
- Outputting your photographs to the computer: the USB connection and its care and use
- Switching between camera picture taking and playback functions
MAKING PICTURES OF YOUR FRIENDS
Objectives: The purpose of this project is to get to know each other in class, learn how to take pictures, and how to import your photographs into your computer.
Assignment: Work in small groups of two or three. Take pictures of your friends in class. Pay attention to framing your images. Try close-ups and distance shots. Experiment with point-of-view. Take pictures from above and below the vantage point of your subjects. Finally, upload your pictures to the classroom computers. Be sure to work on the same computer you worked on last class.
Importing Photographs
Learn how to take pictures and import you photos from the digital camera into your computer.
1. Make a folder with your FULL NAME on it plus the word “FRIENDS” on the desktop of your computer by going to “File” and selecting “New Folder” in the drop-down menu.
2. Plug the cable running from your computer into your camera and click on iPhoto. Select the PLAY mode of your camera. The photos will begin to load into your iPhoto library when you click upload images.
3. Click on “LAST ROLE” and drag your favorite photos from the “Last Role” folder into your desktop folder. These will be stored and saved for later use.
4. Select one of your photos in iPhoto and press the edit button at the bottom of the box and experiment with editing your images. You should experiment with the various options for altering your images. Try choosing shades of grey, sepia tones, and other possibilities. Adjust the color and contrast of your images. Do this with all or your images.
5. Finally drag your altered final pictures into your desktop folder and DRAG YOUR DESKTOP “FRIENDS” FOLDER onto the server. You may have to rename the files in order not to have them conflict with other photos already in your desktop folder.
Part II
Once you have edited and assembled your pictures of friends in your desktop folder, next make a slide show using iPhoto and export it as a small size Quicktime movie file to the desktop of your computer and save it in your folder on the classroom server alias.
DIGITAL CAMERAS AND HOW THEY WORK
Digital Photography Basics
At the heart of digital camera technology lays the innovation of the image sensor. In film-based photography, light is projected onto light-sensitive film that is then chemically processed. In digital photography, the image sensor records the pattern of the light, which is then translated onto a stream of numerical digital information. The sensor is called a CCD and is a fraction of the size of a negative.
How is film-based photography different than digital photography?
The Physical Sensor
The CCD sensor is made of rows of microscopic light-sensitive cells that record the light in a matrix, duplicating the brightness of the light on each cell. This information is all translated numerically and stored as a digital stream, which is then downloaded to the memory card in the camera as an image file. This image file can in turn be downloaded to the computer or printer.
What is a CCD and how does it work?
The sensor’s small size allows the lens system to be small and light. Modern research and technology have refined the processes of lens production to achieve remarkable degrees of sharpness in a smaller lens. The quality of the camera is a combination of the size of the CCD sensor, lens technology, and, most important, the quality of the in-camera computing that undertakes the color interpolation.
What technological advances have made it possible to produce good image quality in digital cameras?
Pixel Image
The CCD, or charge-coupled device, records the light. Each of the squares pictured (see photo) represents a micro-sized light sensor that electronically imprints the light falling at that point. The CCD sensors captures an image in black and white and then passes it through red, green, and blue filters organized in a matrix to form a color image. The camera software then interpolates and translates this digital information to form as pixels on the camera and computer monitor.
A Pixel is short for “picture element.” When viewed together on a screen, pixels create a coherent image in the same way that a printed image is comprised of dots of color mixed optically to form smooth and even tones. The more pixels there are in an image file, the more detail there will be in your photograph and the bigger the print can be.
What is a pixel?
How do the number of pixels affect the final photograph?
Following is an example of how students use mathematical skills to solve complex design principles by using image size and pixel count to determine image resolution.
Pixels and Resolutions
The pixel count determines the resolution of the image, which will add up to so many million pixels called Megapixels. How many pixels do you need? That depends on what kind of output (print quality and size) you want. If you want to print large images at high-quality resolution, you need at least 150, and ideally 300, pixels per inch. To print a 6 x 8 inch image at 300 ppi adds up to 6 x 8 x 300 x 300 pixels per inch = 4,300,000 which is 4 million pixels or 4 Megabytes.
What does the pixel count determine?
What is image resolution?
How many pixels per inch do you need to produce a high quality print?
How many pixels would you need to produce an 8 x 10 inch high quality photograph?
8 x 10 x 300 x 300 pixels per inch = 7,200,000 which is 7.2 million pixels or 7.2 Megabytes.
The web uses the lowest resolution files of a digital files. The viewing screen is only 72 ppi.
Our 2 Megapixel cameras print 4 x 6 inch images or 2,160,000 pixels to precise.
The professional single lens reflex cameras will have 6 – 8 Megapixels and you can print up to 16 x 20 photographs with good quality.
File Size in Camera
In the image menu settings, you can save your images at different levels of definition. The more definition, the more memory an image will require. The camera uses a compression system called JPEG, which compresses the information to take up less memory. Use Fine to obtain the highest picture definition. You may use less high definition if you, for instance, are only making photographs to send to your friend on the web.
What is a JPEG file?
Explain how you can control picture definition in the digital camera that you will be using.
Focus: Lenses
In digital cameras, the image is focused on a CCD sensor rather than on film. Focal length refers to the distance from the point of focus in the center of the lens to the CCD sensor or, the plane on which the image is focused. The focal length of a lens determines the angle of vision that the lens will cover. A wide angle lens covers a wide angle; a telephoto lens covers a narrow angle.
What does the focal length of the lens refer to and how does it determine the size of the image one sees in the camera viewfinder?
Steady Camera
Use a tripod to steady the camera and to reduce camera-shake which makes the image blurry. Also, especially in low light, a tripod must be used. (unless you choose to use a flash). The effect of flash is generally frowned up in advanced photography classes. We will discuss flash later.
What is the function of the camera tripod? Why is it used?
Auto Focus
Auto focus is a very helpful camera function that assesses the subject’s distance from the lens and automatically adjusts the lens to bring your subjects into focus. But sometimes, the auto focus will cause your camera to focus on the wrong part of the scene. Depress your camera shutter button half way once you have focused on your subject and keep it down while you move the camera to where you want it to be and the composition is finalized.
Composition
Composing your image, as Henri Cartier-Bressan a true master of the medium once said, is simply a matter of geometry. Look at your image in the viewfinder and think of a series of geometric proportions. The triangle is often used to define a balanced composition.

How does composition relate to mathematics?
Perspectives- Try to change the camera position and angle to alter the perspective. Try close ups and distance shots. How does this affect the information inside the frame?
Depth of Field
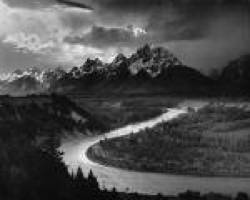
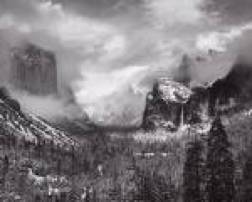
Depth of field refers to how much of a scene is in sharp focus. A shallow depth of field means that only a small plane of the scene is in focus. A great depth of field means that most of the image will be in sharp focus. Ansel Adams was a master of great depth of field in his photographs. (see examples)
By increasing or decreasing the aperture or opening of your camera’s lens, you may control the depth of field. A small aperture means a greater depth of field. A large aperture gives you a shallow depth of field. Most film cameras adjust the initial image at a shallow depth of field, allowing you to focus carefully on your subject. You then stop down or decrease the lens opening to increase depth of focus or depth of field.
What is depth of field?
What does the aperture of the lens refer to?
How does the aperture of the lens affect the finished photograph?
Macro Photography
Many digital cameras feature a macro setting. The macro setting on the camera allows you to capture extreme close ups with a great amount of fine detail.
What is macro photography?
Photographing Movement
You use your camera shutter speed priority to control the moving image. A shutter speed of 1/125th of a second will usually give the feeling of slight movement in an action shot. You might want to experiment with a faster shutter speed in order to freeze movement say 1/500th of a second. A slower shutter speed will purposefully blur the image.
What effect does the camera shutter have on the final image?
Sports action photography
Use a fast shutter speed to freeze action.
ELEMENTS OF COMPOSITION
An eye for composition requires the viewer to notice and organize several visual elements within the frame. Some of these graphical building blocks are texture, pattern and symmetry, shapes and sizes of objects within the frame, and viewpoint and perspective. Framing is how we visualize and organize the visual elements within the rectangular or square two dimensional space or frame of a picture seen through the camera’s viewfinder. Sometimes we wish to isolate details. We care about light, shape, and form. Also light, tone, and contrast become important visual elements in any composition. Shadows and silhouettes are important compositional tools as well.
Go to:
http://www.photographymad.com/pages/view/10-top-photography-composition-rules
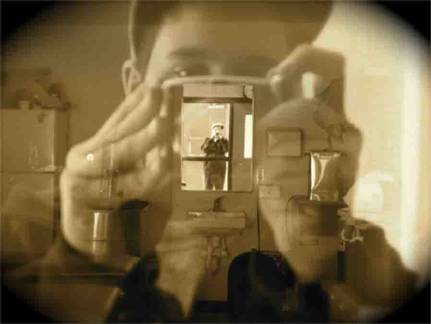
Inside School Reflections, Fragments, Abstractions, Patterns, and Textures
1. Reflections - Pictures of glass, mirrors or other surfaces that show reflections.
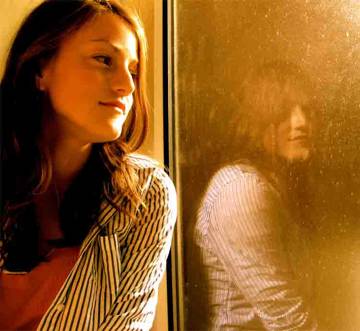
Take pictures of windows, mirrors or other surfaces around school that show reflections.
2. Fragments - Pictures that only show part of an object, not the whole thing. 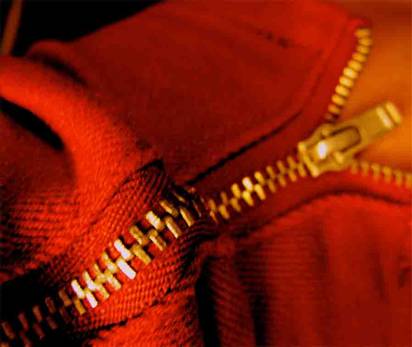
Take pictures of parts of an object, a detail.
3. Abstraction - Photographs which represent reality mainly as patterns and/or shapes and not as recognizable objects.
Take pictures of lines, shapes or unrecognizable three-dimensional forms.
4. Pattern - The repetition of lines or forms in an arranged sequence. 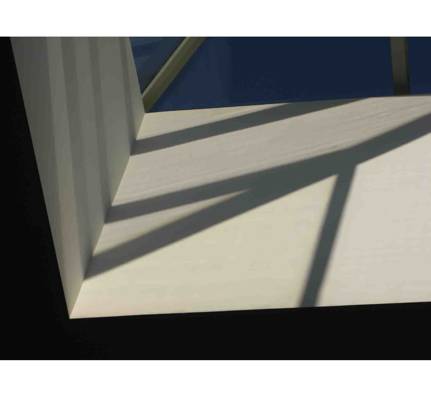

Take pictures of patterns in and around the school.
5. Texture - The surface characteristics of an object such as:
smooth or rough, soft or hard or, shiny or dull.
Take pictures that emphasize the texture of an object or objects. 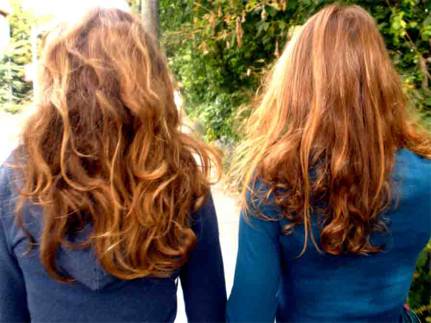
The purpose of this assignment is to expand your indoor composition skills.
Assignment: The class will go inside the school and find the following kinds of images and photograph them. You may photograph only on the ground level and in front of the gym, but do not go inside any classrooms.
Inside School Reflections, Fragments, Abstractions, Patterns, and Textures
1. Reflections - Pictures of glass, mirrors or other surfaces that show
reflections.
Take pictures of windows, mirrors or other surfaces around school that show reflections.
2. Fragments - Pictures that only show part of an object, not the whole
thing.
Take pictures of parts of an object, a detail.
3. Abstraction - Photographs which represent reality mainly as patterns
and/or shapes and not as recognizable objects.
Take pictures of lines, shapes or unrecognizable three-dimensional forms.
4. Pattern - The repetition of lines or forms in an arranged sequence.
Take pictures of patterns in and around the school.
5. Texture - The surface characteristics of an object such as: smooth or rough, soft or hard or, shiny or dull.
Take pictures that emphasize the texture of an object or objects.
Make a folder on your computer’s desktop and put your full name on it plus the word “Inside Patterns”
Drag 10 pictures that accompany the Inside Reflections, Fragments, Abstractions, Patterns, and Textures assignment into your desktop “Inside Patterns” folder.
Now make a slideshow of these photos using iPhoto and the editing software and share these as small Quicktime movie files with your full name on it plus the word “Inside Patterns” and save it to your desktop folder. Be sure to drag your new folder with the Quicktime movie inside it onto the classroom server.
Show your Quicktime slideshow movie to the whole class. Come up one at a time. Get feedback during student critiques.
Assignment: The class will go outside the school and find the following kinds of images and photograph them.
Outside School Reflections, Fragments, Abstractions, Patterns, and Textures
1. Reflections - Pictures of glass, mirrors or other surfaces that show
reflections.
Take pictures of windows, mirrors or other surfaces around school that show reflections.
2. Fragments - Pictures that only show part of an object, not the whole
thing.
Take pictures of parts of an object, a detail.
3. Abstraction - Photographs which represent reality mainly as patterns
and/or shapes and not as recognizable objects.
Take pictures of lines, shapes or unrecognizable three-dimensional forms.
4. Pattern - The repetition of lines or forms in an arranged sequence.
Take pictures of patterns in and around the school.
5. Texture - The surface characteristics of an object such as: smooth or rough, soft or hard or, shiny or dull.
Take pictures that emphasize the texture of an object or objects.
Make a folder on your computer’s desktop and put your full name on it plus the word “outsidepatterns”
Drag 5 -10 pictures that accompany the Outside Reflections, Fragments, Abstractions, Patterns, and Textures assignment into this new desktop folder.
Now make a slideshow of these photos using iPhoto and the editing software and share these as small Quicktime movie files with your full name on it and save it to your desktop folder.
Drag your Quicktime movie slideshow into your folder on the server. Be sure to drag both your Quicktime slideshow plus your new “outside patterns” folder into your folder on the classroom server. These files will be used to display your pictures on school televisions and for grading purposes.
LANDSCAPE PHOTOGRAPHY
Landscape: a picture representing an area of countryside : [as adj. ] a landscape painter.
Go to:
http://www.photographymad.com/pages/view/landscape-photography-tips
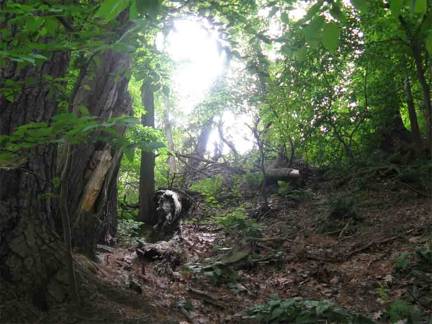
Photo by Brittany Martin

Photo by Ansel Adams
ANSEL ADAMS SLIDESHOW
The purpose of this project is to learn how to make a presentation using Appleworks or PREZI and to learn about the photographs of Ansel Adams. Your work will be judged by the quality of your presentation.
- Open Appleworks by double clicking on its icon on the dock of your computer.
- Go to File and click New Presentation in the dropdown menu.
- Select Presentation.
- Press the + button 20 times.
- Drag between at least 20 large size Ansel Adams Google images into your presentation.
- Add text to your presentation by clicking on the “A” button. Experiment with different sizes, fonts and colors.
Research and write in your own words, a one-page essay about Ansel Adams. Who was he? What did he do? Where did he photograph? Add this to your presentation.
Make sure you save your presentation with your name plus the word “Adams” and put it into your folder on the classroom server.
Watch the Ansel Adams documentary and answer the following questions:
- Who was Ansel Adams?
- Where did he make his most famous photographs?
- What type of camera did he use? Was it a digital or a film camera?
- Did he use a darkroom or a computer to make his pictures?
- Many photographers are also musicians. What musical instrument did he play?
- How did he become famous?
- Who helped him become famous?
- Is there a mountain named for him?
- Did he mostly photograph in color or in black and white?
- Who was Georgia O’keefe? How did they know each other?
EDWARD WESTON SLIDESHOW
The purpose of this project is to learn how to make a presentation using Appleworks or PREZI and to learn about the photographs of Edward Weston. Your work will be judged by the quality of your presentation.
- Open Appleworks by double clicking on its icon on the dock of your computer.
- Go to File and click New Presentation in the dropdown menu.
- Select Presentation.
- Press the + button 20 times.
- Drag between at least 20 large size Edward Weston Google images into your presentation.
- Add text to your presentation by clicking on the “A” button. Experiment with different sizes, fonts and colors.
Research and write in your own words, a one-page essay about Edward Weston. Who was he? What did he do? Where did he photograph? Add this to your presentation.
Make sure you save your presentation with your name plus the word “WESTON” and put it into your folder on the classroom server.
Watch the Edward Weston documentary and answer the following questions:
- Who was Edward Weston?
- Where did he make his most famous photographs?
- What type of camera did he use? Was it a digital or a film camera?
- Did he use a darkroom or a computer to make his pictures?
- How did he become famous?
- Who helped him become famous?
- Did he mostly photograph in color or in black and white?
Gordon Parks Slide Show
The purpose of this project is to make a PowerPoint presentation and to learn about the photographs of Gordon Parks. Your work will be judged by the quality of your presentation.
Write a one-page essay that includes answers to the following questions:
- Who was Gordon Parks?
- Where did he make his most famous photographs?
- What type of camera did he use? Was it a digital or a film camera?
- Many photographers are also musicians. What musical instrument did he play?
- How did he become famous?
- Who helped him become famous?
- How did racism affect him? What barriers did he overcome?
- Did he mostly photograph in color or in black and white?
- Open PowerPoint by double clicking on it’s icon on the dock of your computer.
- Go to File and click New Presentation in the dropdown menu.
- Select Presentation.
- Drag at least 20 large size Gordon Parks Google images into your presentation.
- Add text captions to your presentation.
Roy DeCarava Slide Show
The purpose of this project is to make a PowerPoint presentation and to learn about the photographs of Roy Decarava. Your work will be judged by the quality of your presentation.
Write a one-page essay that includes answers to the following questions:
- Who was Roy DeCarava? Where was he born?
- Where did he make his most famous photographs? What did he like to take pictures of?
- What type of camera did he use? Was it a digital or a film camera?
- How did he become famous?
- How did racism affect him? What barriers did he overcome?
- Did he mostly photograph in color or in black and white?
- Open PowerPoint by double clicking on it’s icon on the dock of your computer.
- Go to File and click New Presentation in the dropdown menu.
- Select Presentation.
- Drag at least 20 large size Gordon Parks Google images into your presentation.
- Add text captions to your presentation.
GO TO CHILDS PARK AND THE MILL RIVER AND PHOTOGRAPH LANDSCAPES AND WATERSCAPES
Upload your landscape pictures into iPhoto. Create a folder on the desktop of your computer with your name on it that includes the word “land”. Select your favorite landscape pictures from the Childs Park and the Mill River series, and drag them into your landscape folder on the desktop. (Select a few of your best landscape pictures and re-label them with your name plus the word “bestland” (plus add a 1, 2, or 3 etc. at the end of your file name in order to distinguish them from the others).
Finally, double click and open the server alias, type in your class’ password, and drag your landscape folder into your folder on the server. I will make a slideshow for the televisions with your best landscape photographs.
This exercise will test your picture making and computer skills learned to date.
1. DRAG YOUR BEST LANDSCAPE (NATURE) PICTURES FROM YOUR SERVER FOLDER INTO A NEW FOLDER ON THE DESKTOP OF YOUR COMPUTER.
2. OPEN IPHOTO AND DRAG THIS LANDSCAPE FOLDER INTO A NEW ALBUM MARKED WITH YOUR NAME PLUS THE WORD "LAND" IN IPHOTO.
3. MAKE A SLIDESHOW OUT OF YOUR BEST LANDSCAPE PICTURES AND EXPORT IT BY GOING TO FILE AND THEN EXPORT TO A SMALL SIZE QUICKTIME MOVIE FILE.
3. BE SURE TO PUT YOUR NAME PLUS THE WORD “LAND” ON THE SMALL SIZE MOVIE FILE WHERE IT SAYS “SAVE AS” AND SAVE IT ONTO THE DESKTOP OF YOUR COMPUTER.
4. DRAG YOUR SMALL SIZE QUICKTIME LANDSCAPE MOVIE FILE INTO YOUR FOLDER ON THE SERVER.
WHEN YOU ARE FINISHED, CALL ME OVER. I WILL GRADE YOUR QUICKTIME MOVIE SLIDESHOW MARKED WITH “YOUR NAME” PLUS THE WORD “PROGRESS” FROM YOUR SERVER FOLDER.
LANDSCAPE SERIES CRITIQUES:
Since a major part of learning about art and the art process happens when teachers and young people talk about art, evaluation and discussion should be an integral part of the classroom. Plan for a short evaluation or discussion time during photography class.
HAVE STUDENTS CRITIQUE EACH OTHERS LANDSCAPE PHOTOGRAPHS. STUDENTS SELECT ONE OF THEIR BEST PHOTOGRAPHS FOR DISPLAY AND SENDS THEM ELECTRONICALLY IN A FOLDER WITH THEIR NAME PLUS THE WORD “CRIT” ON IT TO THE TEACHER VIA THE CLASSROOM SERVER. THE TEACHER ASSEMBLIES THESE INTO SLIDE PRESENTATION IN IPHOTO AND PROJECTS THEM ONTO THE SCREEN. STUDENTS MAY MAKE POSITIVE COMMENTS ABOUT EACH OTHER’S PHOTOGRAPHS. FOR EXAMPLE: “I LIKED THE WAY YOU……….”
FINALLY THE TEACHER WILL PUT ALL IMAGES IN A DVD SLIDESHOW FOR PROJECTION ON THE SCHOOL TELEVISIONS.
LANDSCAPE SERIES CRITIQUES:
HAVE STUDENTS CRITIQUE EACH OTHERS LANDSCAPE PHOTOGRAPHS. STUDENTS SELECT ONE OF THEIR BEST PHOTOGRAPHS FOR DISPLAY AND SENDS THEM ELECTRONICALLY IN A FOLDER WITH THEIR NAME PLUS THE WORD “CRIT” ON IT TO THE TEACHER VIA THE CLASSROOM SERVER. THE TEACHER ASSEMBLIES THESE INTO SLIDE PRESENTATION IN IPHOTO AND PROJECTS THEM ONTO THE SCREEN. STUDENTS MAY MAKE POSITIVE COMMENTS ABOUT EACH OTHER’S PHOTOGRAPHS. FOR EXAMPLE: “I LIKED THE WAY YOU……….”
FINALLY THE TEACHER BURNS ALL IMAGES ON A DVD SLIDESHOW FOR PROJECTION ON THE SCHOOL TELEVISIONS. (Update this with new electronic data transmission and display on school televisions).
Talk about composition, light, and atmosphere. Show examples of each. Stieglitz image of horses in NYC.
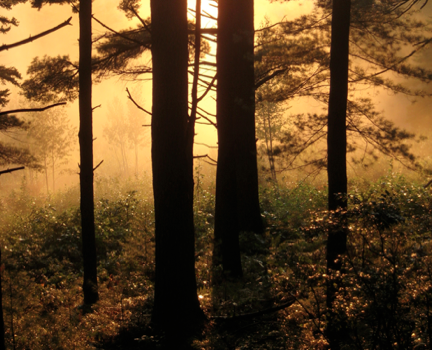
Photograph by Michael Jacobson-Hardy
THE USE OF SPACE AND POINTS OF VIEW IN PICTURES
ASSIGNMENT #1: Choose a single subject to photograph (this could be a person or an object). Try to shoot the object against a somewhat simple background (not too busy), such as a plain wall or an empty field, etc. Take pictures of the subject from as many different angles as possible: from the left, the right, above looking down, below looking up, diagonally, etc. Then take some shots of the subject from far away, close up, and from the mid-ground.
WORKSHOP #1:
Look at well-known photographs that contain unique perspectives and points-of-view. Discuss effects.
Write about and discuss the effects of differing perspective and point-of-view from differing angles in each other’s shots. Then, choose your favorite of your own shots and write about it, including some aspect of perspective.
Briefly follow same procedure taking shots near or in the Lab that have two or more subjects in them. Bring back and discuss.
Introduction to Still Life Lesson
Objectives:
- Provide students with a foundation in the possibilities of still life photography by looking at the methods other photographers have used to achieve their desired effects.
- Build upon previous lessons in which students searched for man-made elements of art and design inside their school and then organic forms outside. Now we are bringing the outside in. Did students prefer one way of shooting over another? Engage in an inquiry-based dialog with students about what they see happening, what they think works and what doesn’t work in the slideshow of images from contemporary and historical photographers. Brainstorm with the students about how they might achieve similar effects in this classroom. How does the photographer create emotion, or lack of, using only objects? How can you show your thoughts, feelings, and your hand in these images?
Vocabulary:
Still Life: find out what the students define this as before starting the slideshow and then after.
Visual Metaphor: ask students what they think of when they hear this term. When something is used to represent something else in an image.
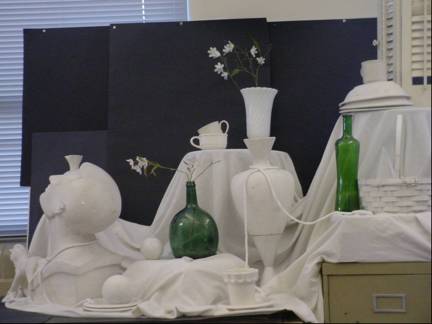
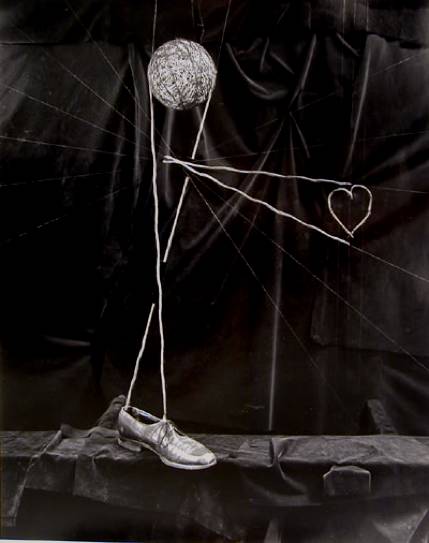
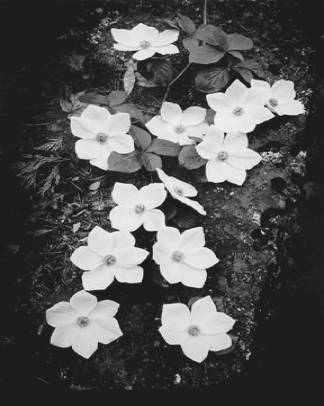
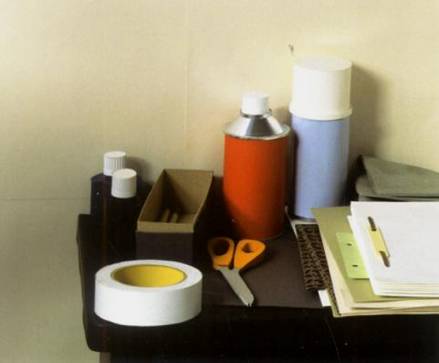
Still Life Photography:
A still life is a work of art that shows objects. The objects might be shoes, books, or flowers. In a still life, the artist usually wants us to see the objects in a new way. The artist may want us to think about the meaning of the objects, too.
Make a still life photograph from objects found inside your classroom. You may want to bring in objects to make into your still life picture.
The following assignment is designed to encourage interaction with and exploration of art elements including: line, texture, shape, color, value and composition.
Assignment:
Set up still life compositions with objects found in the classroom. Bring in some of your own. Study shapes and color composition. You may want to try different color backgrounds using construction paper.
Explore using colors and shapes. What are the primary colors and how can they be used. How about the secondary colors?
The next assignment: Flowers and Still Life Photography; The Environment; Animals; and People—suggest basic strategies for helping students use photography to explore familiar objects and places in their world.
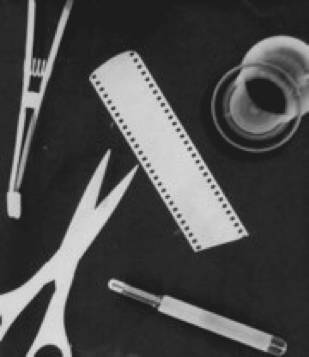
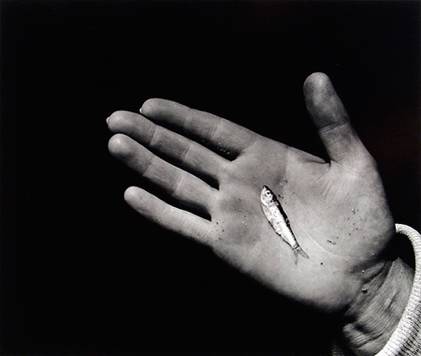
A still life is an arrangement of inanimate objects as s subject for painting, drawing, or photographing.
Look at the following examples of important still life photographs and talk about them with fellow students. Lead the group in the following visual teaching strategies format. Have students answer the following questions:
- What do you think is going on in this picture?
- What do you see that makes you say that?
- What more can we find?
Paraphrase student answers.
For more information on VTS o to www.vue.org. Look for the category visual understanding in education.
Have students practice visual literacy skills.
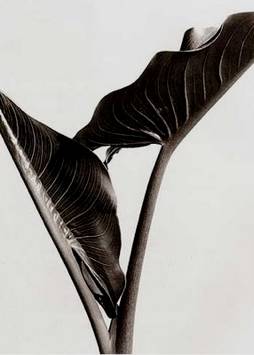
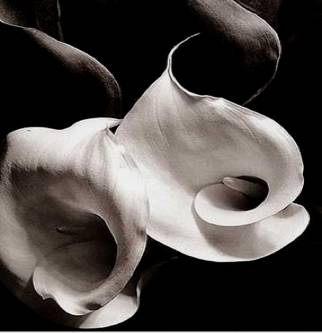
Still Life Images
Zeke Berman
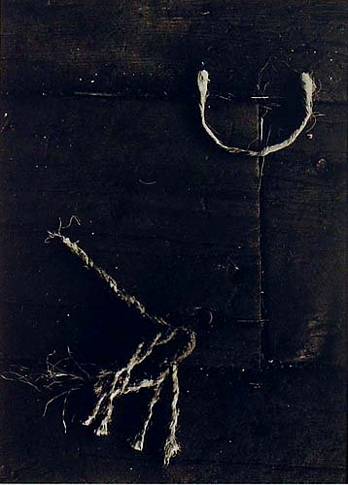
Aaron Siskind
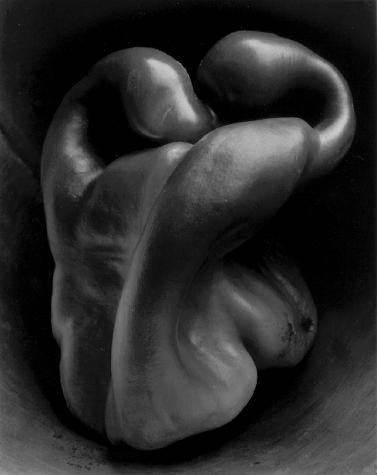
Edward Weston
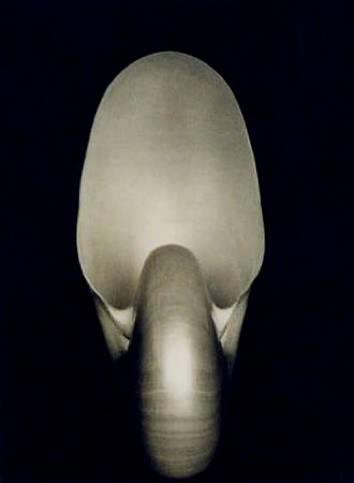
Edward Weston
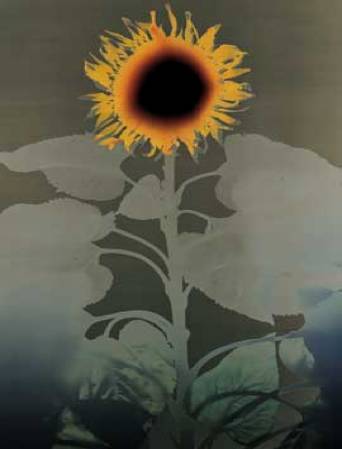
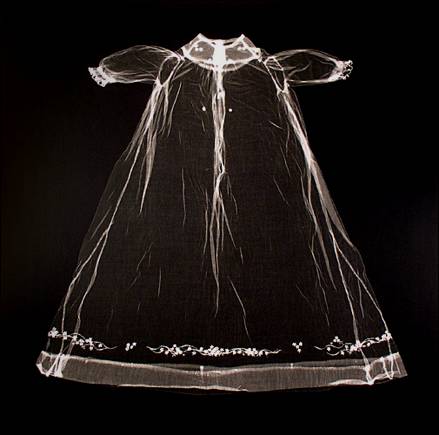
Adam Fuss

Adam Fuss
 Hiroshi Sugimoto
 Karen Savage
 Ansel Adams
 Thomas Demand
 Man Ray
Aaron Siskind
Imogene Cunningham
Imogene Cunningham
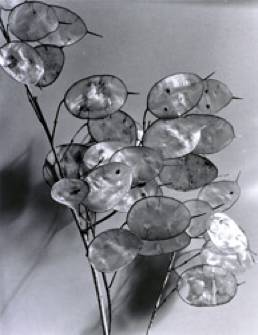
Imogene Cunningham
 Penelope Unbrico
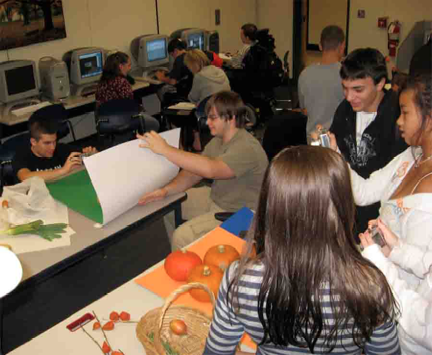
Fall Still Life Photography Unit Plans:
In the middle of October, bring in pumpkins, gourds, corn stalks, and arrange and photograph these in the classroom. Students may use color or white poster board found in class as backgrounds for their compositions. The words for today are “Composition” and “Still life.”
Open your photos in iPhoto and edit them. Try adding a subtracting color. Use other effects. Drag your best images into a folder on your desktop with your name plus the word “fallstilllife” drag you best fall still life photos into the desktop folder.
Be sure to drag this folder into your server alias.
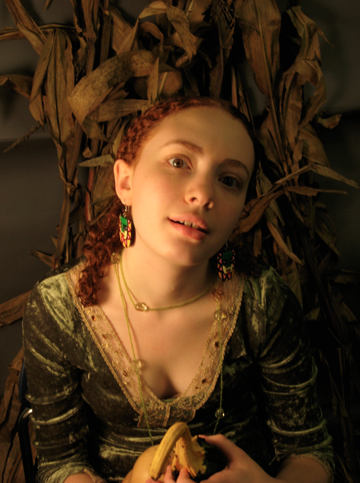
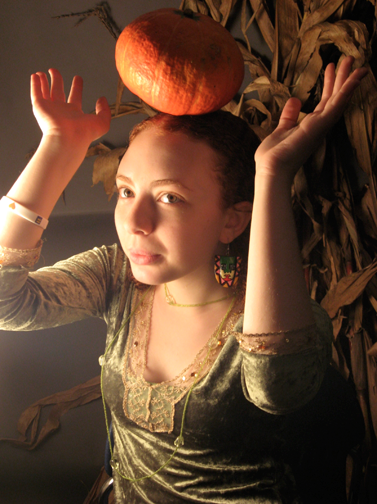
APPROACHING THE MONTH OF OCTOBER
Halloween is a fun time to photograph. Bring in fall harvest objects like corn stalks, pumpkins, gourds and the like and assemble these into still lifes. You may want to place yourself or a friend into the picture. Be sure to display these in your school. You may want to make slideshows and put them on TV monitors in the halls.
You may want to come to class dressed up for Halloween and have someone make your portrait. Use the studio lights to do so.
Next make a slideshow of these photos and share these as Quicktime files with your full name on it and save it to your desktop folder. (I will demonstrate how to make a Quicktime movie file.) These files will be used to display your pictures on school televisions and for grading purposes. Be sure to put both your Quicktime slideshow and individual album jpeg files into your desktop folder.
Show your Quicktime slideshow movie to the whole class. Come up one at a time. Get feedback. Critiques.
Experiment with film noir lighting effects.
Next learn about lighting techniques such as those used in film noir. Use ordinary light bulbs in reflectors to experiment with light. Try bare bulbs. Try reflectors. Diffuse light with soft boxes.
(Samples of student work here.)
Later in the week, bring in costumes to photograph and make additional still life pictures.
Experiment with film noir lighting techniques using available lights in the classroom. Show the Videomaker Film Noir clip and have students experiment with lighting.
You must make a folder on their desktops titled with their names plus the words “Fall still life” and drag their still life pictures into the folder.
Drag your Quicktime movie slideshows into your folder on the server. These files will be used to display their pictures on school televisions and for grading purposes.
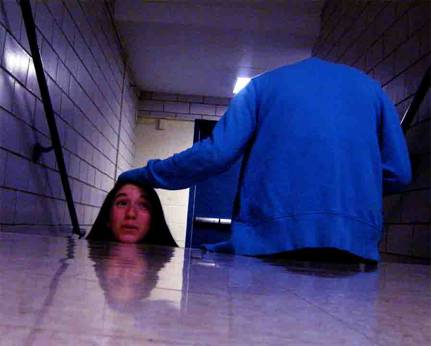
Long Exposure
This image was made by placing the camera on a tripod with an exposure setting of ten seconds. The subject, wearing a long black coat, stood in front of the camera for about three seconds, then ran out of the frame, resulting in a semi-transparent image.
Make Ghost Images
To make a ghost image, you must turn off the camera flash and adjust the shutter speed of your camera to about 1 second.
To do this:
- Turn on your camera
- Set the top dial to TV (or Time Value)
- Click right or left on the circle pad until you see 1 second
- Hold the camera still and photograph a friend moving
- View his or her ghost image on the screen
If you don’t have a TV control, try going into camera menu and selecting the lowest film speed setting such as ISO 50. This will slow the shutter to its lowest speed.
Make a folder on your desktop with your name on it plus the word “ghost.” Drag your best ghost images into this folder and put it on the classroom server. I will project them onto the school televisions during Halloween week.
PHOTOSHOP AND COMPUTER ANIMATION
Objectives: Learn to use Photoshop. Use the Tools in Photoshop to Create an Animation
Photoshop Exercise 1
Introduction to Photoshop
- Double click on the Photoshop icon on the desktop dock of your computer.
- Look on the left-hand side and observe the variety of controls. We begin with learning how to create a new document, size your images, and paint. Then we will learn how to create text.
- Under File, choose New and create a new blank image. The size of your image is determined by the pixels on your screen. Size the image by typing numbers in the pixels/inches dialogue box on the screen. In inches, choose 5 inches tall by 7 inches wide (or 360 pixels tall by 504 inches wide).
- Resolution refers to how many pixels per inch you will need in order to make an image suitable for display or reproduction. All computer monitors are calibrated for 72 pixels per inch. Make the resolution 72 pixels/inch.
- Select White for the background color.
- Name it with your name plus the words “Photoshop1.”
- Choose a foreground color you like.
- Choose the paintbrush tool on the dock and select a color by clicking on the color picker dialogue box and start painting.
- Experiment with choosing different colors on the color wheel as well as brush sizes.
- Use the eraser tool to erase some of your marks.
- Now click on the “T” or Text tool. Create a text box. Add some text. Try selecting different fonts, sizes, and colors.
- As always, save your new files in your folder on the server.
Photoshop Exercise 2
- Create a new document that is 640 pixels x 480 pixels and 72 dpi with a transparent background.
- Do a google image search for a place (town, city, country, landscape, etc.) of your choice.
- Download the landscape image to your desktop.
- Open the image in Photoshop.
- Select an area of your downloaded image and paste it into your document.
- Use transformations, and the move tool to get line up your environment the way you like. It will be the background of your image.
- Do a google image search for an animal or piece of furniture of your choice.
- Download the image.
- Open it in Photoshop.
- Use the selection tools to select just the animal or furniture (don’t worry too much you can use the eraser later to clean it up).
- Cut the animal or furniture and paste it into your background image.
- Use the transformation and move tools to position your animal or furniture.
- Use the eraser to make any final adjustments and to clean up the outline.
- Flatten your image and save it to the desktop.
PHOTOSHOP ANIMATION
Objectives: Learn how to make a computer animination like you see on television and in the movies.
This exercise will give you a window into what is happening in major motion picture animations studios using the latest computer technology.
- For this exercise import a “large size” background image from Google images onto your desktop.
- Open it in a new Photoshop document set to 480 x 640 pixels at 72 ppi.
- Make a new folder on your desktop. Name it with your name plus the word “animation”. You will save all new photos in this animation folder.
- Now open an image from google images that you would like to use to animate your movie.
- Copy and past this image over your background image and make incremental changes or moves while saving each change as a jpeg file marked 1, 2, 3, etc. Be sure to put these into a your new desktop folder.
- Be sure to save your new images as a jpeg files instead of a Photoshop files each time you alter the image. (You may want to drag your foreground images along the background to see how it can be animated).
- Remember to number each new jpeg from 1 to however many images you need in order to complete your animation.
- Make a NEW ALBUM with your name plus the word “animation” by using the + button in iPhoto. You should see a blank box.
- Drag your animated pictures folder into your new iPhoto album folder and watch as your pictures import into iPhoto. This will give you an idea of how your animation will look.
- Open iMovie and create a new document with your name plus the word animation.
- Double-click on MEDIA and then the word PHOTOS and find your animation pictures folder in the box.
- Click on one picture.
- In the edit menu on top of your screen, choose SELECT ALL pictures.
- Set the timing (rabbit) and import all photos at .03 second into the iMovie timeline.
- Now play your movie. Add sound and special effects.
- FINALLY, SHARE YOUR IMOVIE AS A FULL SIZE QUICKTIME MOVIE FILE AND DRAG IT INTO YOUR FOLDER ON THE SERVER.
PORTRAITURE
Objectives: Introduce the fundamentals of portraiture. View and discuss various photographic portraits and what makes each powerful. Go over practical, technical, and conceptual ideas of making portraits.
Although young people are accustomed to having their pictures taken, in school pictures and family snapshots, they seldom have control over the technology or the expectations governing the picture making. Here students choose their point of view and make pictures that reveal what they want people to see. In making their self-portraits, students decipher, discover, and highlight their unique identities.
portraiture
noun
the art of creating portraits.
• graphic and detailed description, esp. of a person : it’s part murder mystery and part portraiture through poetry.
• formal a portrait.
ORIGIN late Middle English : from Old French, from portrait (see portrait ).
Portrait Assignment 1:
Step 1: Choose a person in class. Write about what you imagine the ‘perfect’ portrait of this person might look like. What decisions will you make about framing, perspective, lighting, etc.? What will the person be doing? Wearing? Where will s/he be? Try to explain how your choices reflect something about the person.
Step 2: Take multiple portraits of the person you wrote about, playing with different framing and perspective in each. Finally, try to ‘make’ the portrait you wrote about in class.
Step 3: Download the portraits. Choose your favorite one.
Writing Assignment: Write about the portrait you made. Include information we can ‘see’ in the photo, as well as what we might not see. Describe the person in detail (personality, physical characteristics, etc.), as well as your feelings about / relationship to that person.
Save your photos and writing on your classroom server to share with the class.
Portrait Assignment 2: Choose two people in your life who have a relationship with each other you can photograph together. This could be YOU and a friend, family member, teacher, etc. It could be two friends. It could be your parents. A parent and a sibling, etc. Anyone! Thinking about FRAMING and PERSPECTIVE, make a picture that shows some aspect of the relationship between these two people. Try taking SEVERAL different photos of these people, so you can choose your favorite one.
Download images and work on any needed adjustments.
Writing Assignment: Write about the ‘relationship’ portrait you made. Include information we can ‘see’ in the photo, as well as what we might not see. Describe who we are seeing in the image and what their relationship is like. How does your photograph capture elements of the two individuals, and especially of their relationship together?
Share ‘relationship’ portraits and writing with group by putting them on the classroom server.
STUDIO PORTRAITS
The purpose of this assignment is to learn about lighting, composition, and studio portraiture. Portraiture is one of the most lasting and interesting kinds of photography. We will learn in this exercise how to light and take thoughtful and well-composed pictures of our friends in class. Be sure to turn off your camera’s flash because it will interfere with the studio lighting that we create.
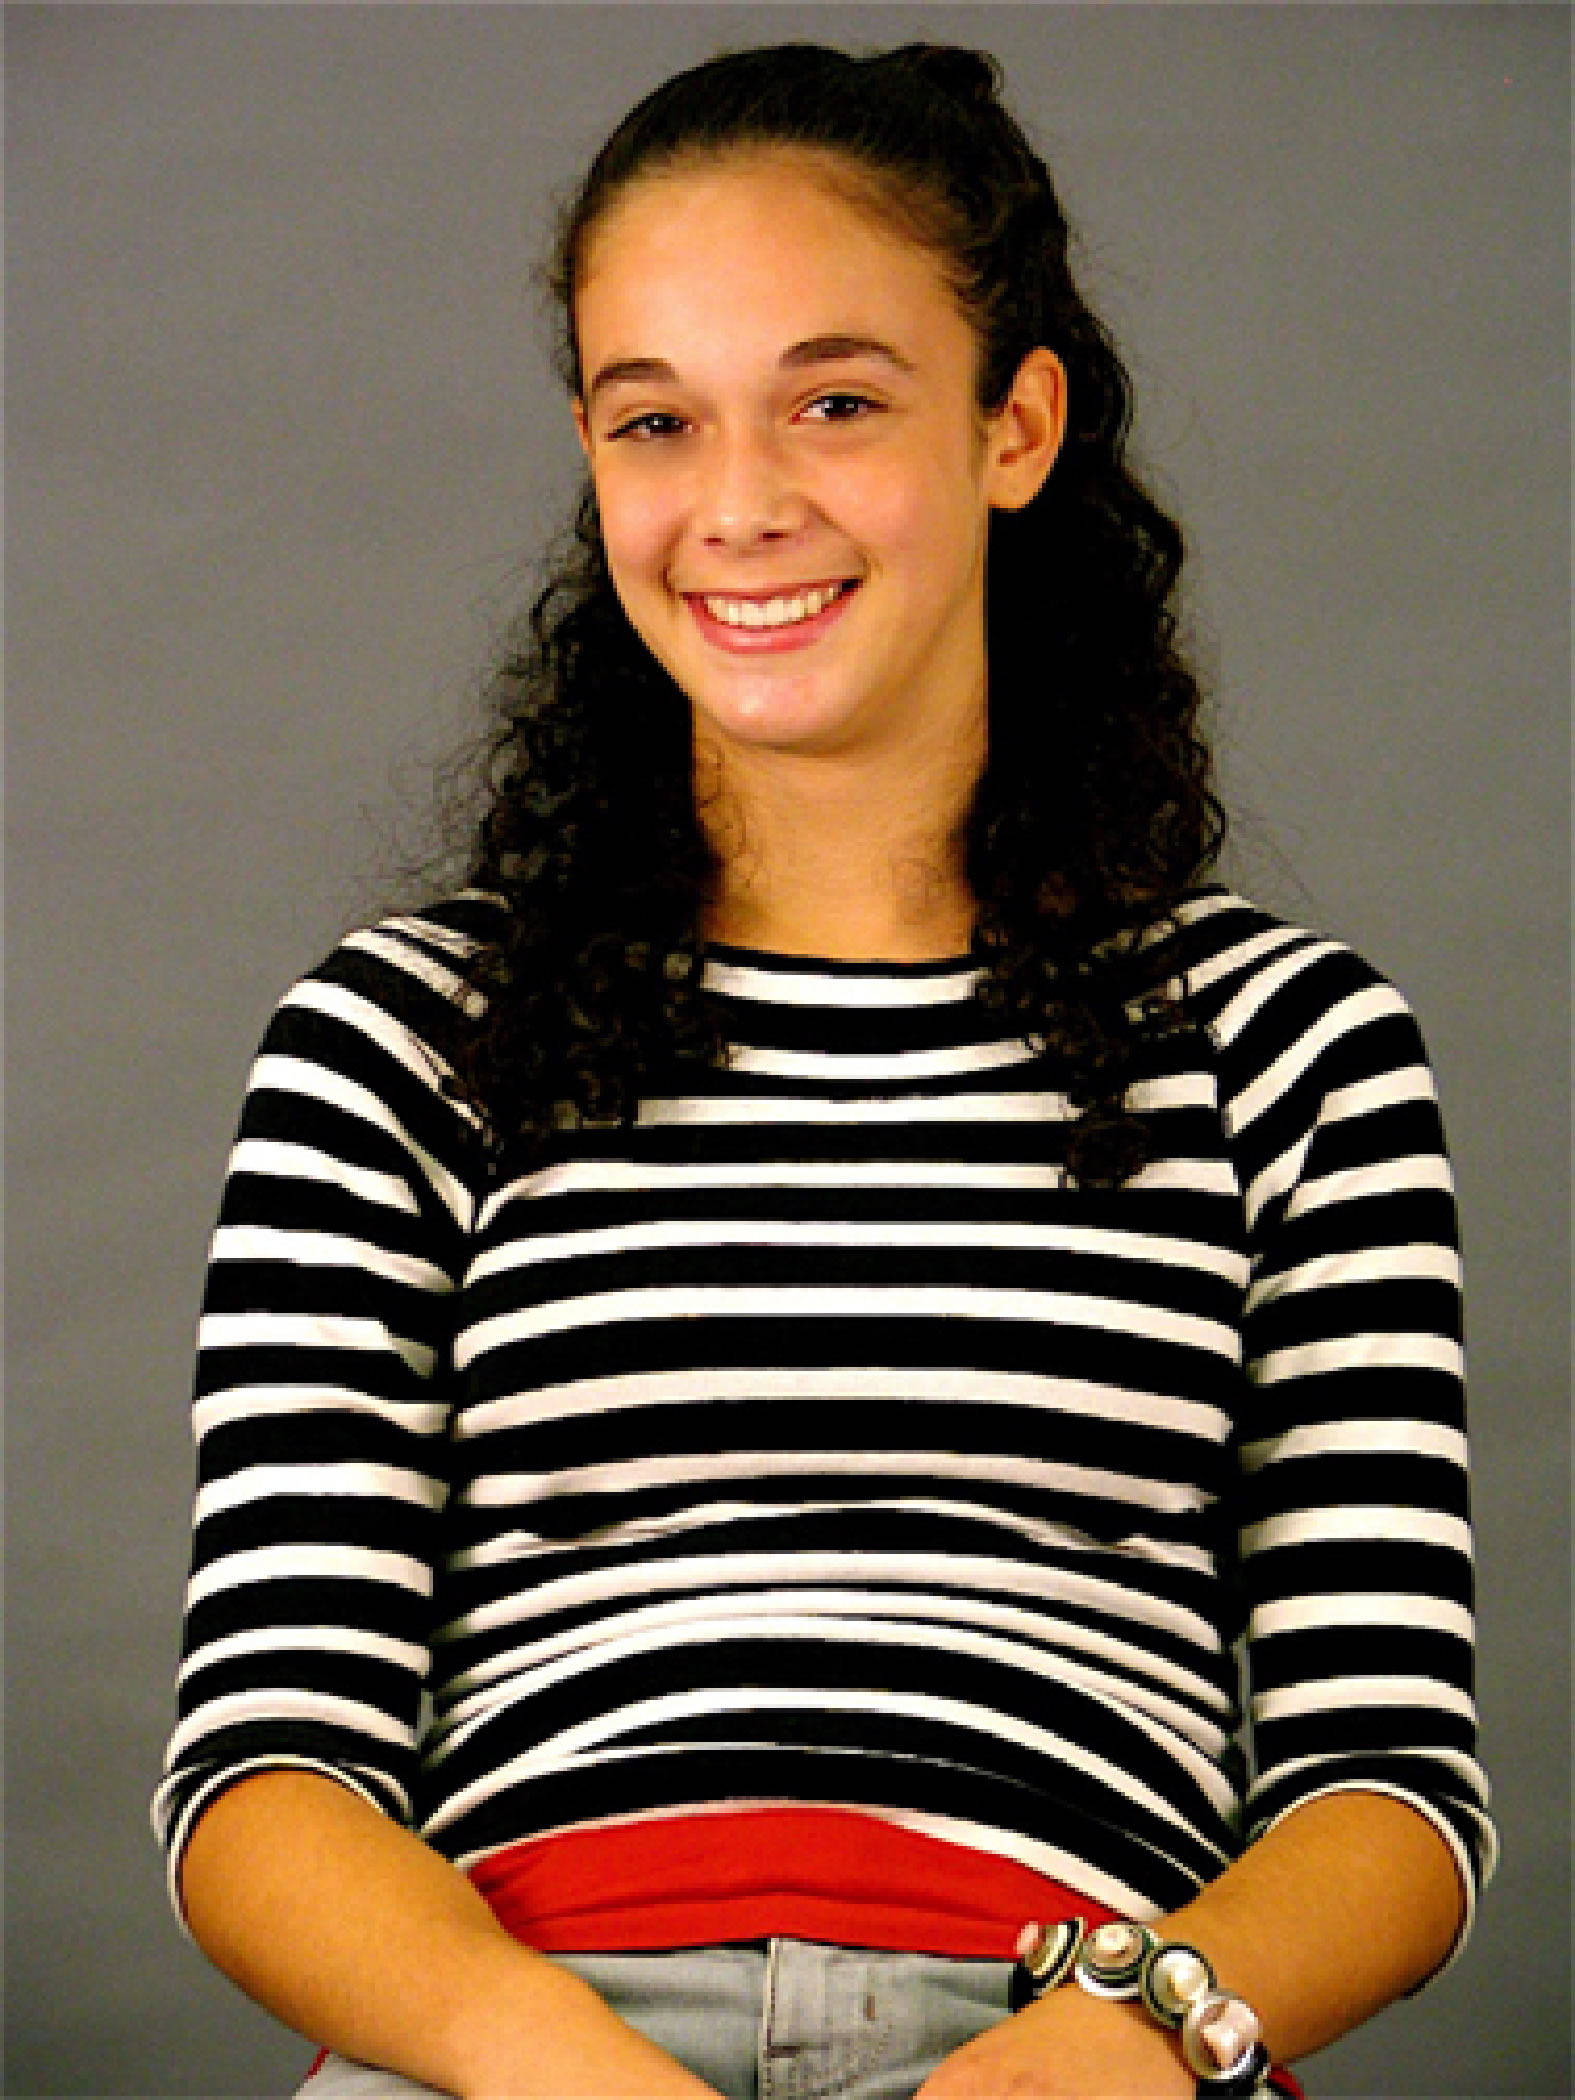
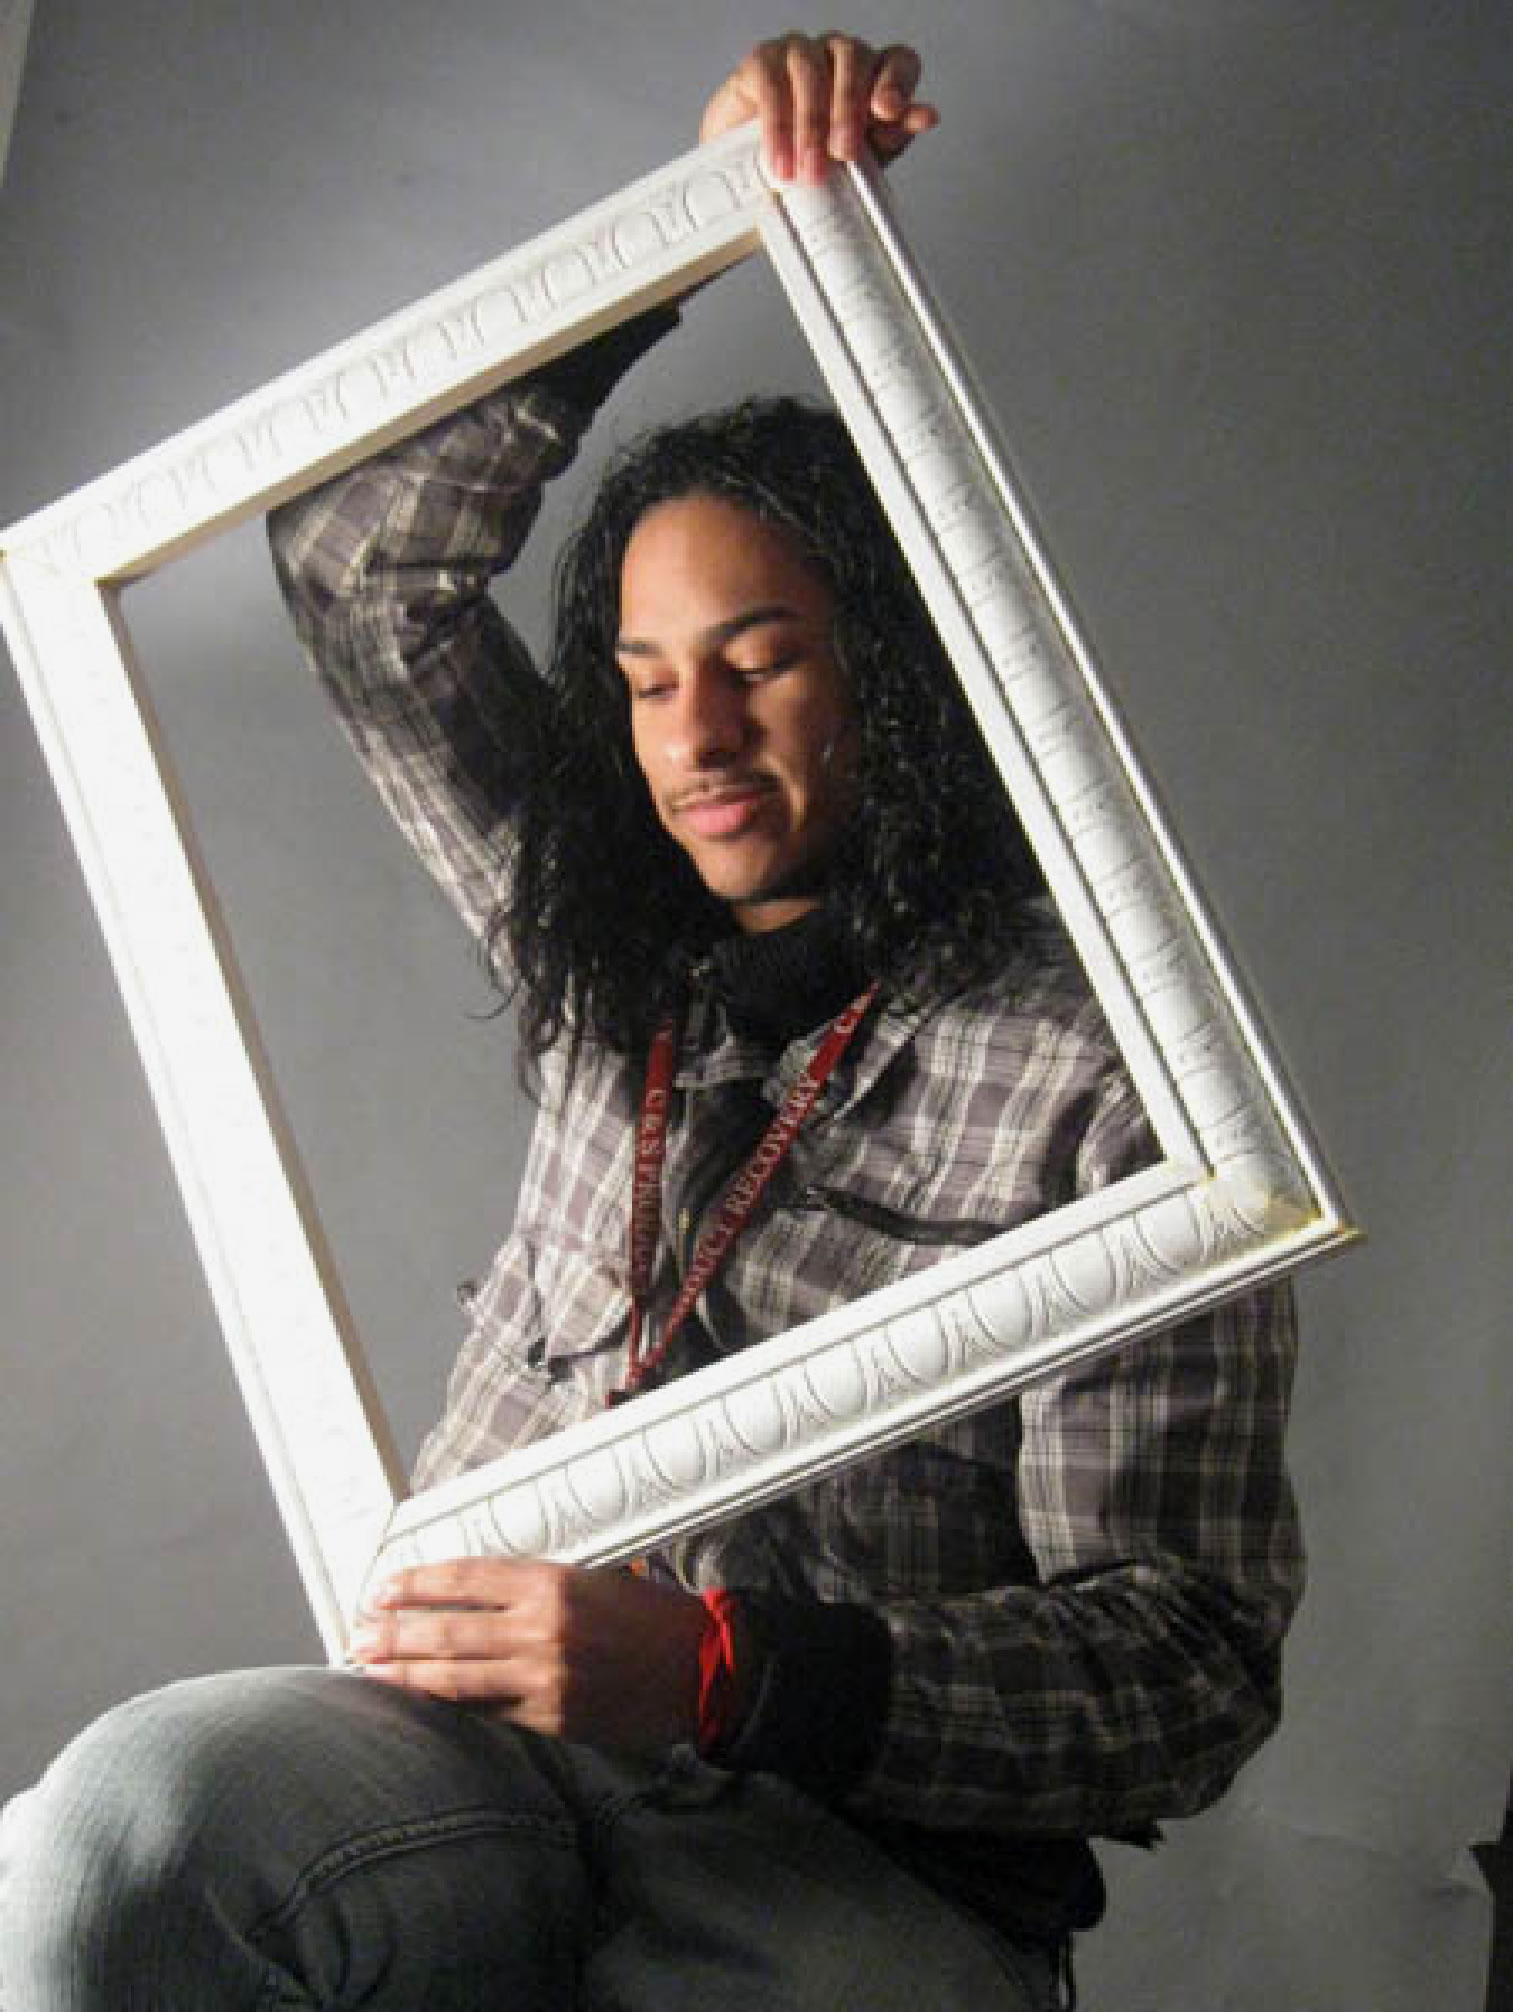
Photo by Orlando Soto
Watch Grynn and Barrett portrait photography video.
LIGHTING
Studio Lighting and Natural Lighting
Hard light
The sun is generally the only light source in the sky. It is often reflected and diffused by clouds and other man-made objects. Try taking pictures at several different times of day to see how the angle and condition of the light changes the image.
Hard light is the kind of light you see on a sunny blue-sky day. It produces deep shadows and bright highlights. This kind of light is less forgiving and makes for difficult conditions to work in, especially when you want to make a portrait. Instead try and photograph people in the shade rather than in harsh sunlight.
Soft light:
A hazy day will produce a soft lighting effect in your photograph. Colors seem to saturate best in these conditions. This is the same effect we achieve in the studio by lighting with umbrellas that are used to soften the light.
Finally we use a seamless grey backdrop to create the feeling of space and not detract from the person in the picture, after all the person is what you want to bring out in your portrait.
Answer the following questions:
What is hard light?
What is soft light?
What is high contrast?
What is low contrast?
What is key light?
What is fill light and how is it used?
What is backlight and why is it used?
Watch Video Tips podcast about lighting.
Key Vocabulary Words:
hard light, soft light, high contrast, low contrast, key light, fill light, backlight, diffuse light
LIGHTING
Three Point Lighting: Demonstration in the classroom
The Standard 3-Point Lighting Technique
The Three Point Lighting Technique is a standard method used in visual media such as video, film, still photography and computer-generated imagery. It is a simple but versatile system which forms the basis of most lighting. Once you understand three point lighting you are well on the way to understanding all lighting.
The technique uses three lights called the key light, fill light and back light. Naturally you will need three lights to utilize the technique fully, but the principles are still important even if you only use one or two lights. As a rule:
- If you only have one light, it becomes the key.
- If you have 2 lights, one is the key and the other is either the fill or the backlight.
|
Key Light |
|
|
Fill Light |
|
|
Back Light |
|
If you have a fourth light, you could use it to light the background of the entire scene. |
||


Materials:
Lighting umbrellas
Lights and light stands
White poster board
Digital cameras
Seamless backdrop
Classroom book PHOTOGRAPHY
Studio and School Portraits
Make a series of studio portraits. Experiment with light. Be creative. Try changing the angle of the light and see what effect this has on your portraits. Use umbrellas to soften the light. Try using a bear light bulb to see what happens to the image. Try bouncing the light off a white poster board and see what it does to fill in shadows.
Take turns making portraits of your friends in class.
• Make a folder on the desktop of your computer titled with your name plus the word “Portraits.”
• Import your studio portraits using iPhoto.
• Drag your best portraits from the iPhoto library into the new portraits folder you made on your desktop.
• Alter your original portraits using iPhoto. Use the black and white, sepia, and cropping tools to alter your original pictures. Now drag the altered pictures from the library into your desktop folder.
• Add any portraits made on the ground floor outside the classroom to your folder on the desktop in the same manner.
• Finally drag the portraits folder with your name on it onto the server.
• These files will be graded and used to display on school televisions.
Reading Assisgnment:
Read pages 259-271 and 282-285 in your classroom textbook, and write a summary of what you have read. Hand these into me when you are done. Be sure to put your name on top of your summary.
In addition, answer the following questions on the same sheet of paper.
Answer the following questions:
What is hard light?
What is soft light?
What is high contrast?
What is low contrast?
What is key light?
What is fill light and how is it used?
What is backlight and why is it used?
Assignment:
Outdoor Portraiture
On a good day, go outside and experiment with different natural lighting conditions to see what effect natural light has on your pictures. Try sunlight and try taking pictures in the shade. As always be creative.
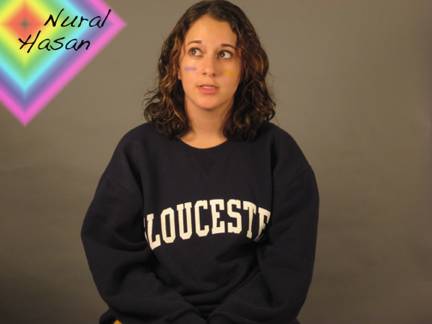
Assignment:
Photographing Emotions
Make a series of emotion portraits in class by getting your subject to pose and show a variety of expressions including grief, anger, laughter, fear, etc. How can you help your sitter display emotions for the camera?
Photo Literacy: Write an expressive piece that fits your mood/emotion portraits. It could be a poem that expresses a mood or point of view about issues and ideas. Make a folder on your desktop with your name and the word book on it. Drag your writing into your desktop folder and save it on the server.
Make a slideshow of your pictures and your words and save them onto the server in your folder as “Emotions.”
Experiment with various lighting techniques such as film noire to render your chosen emotional affect. You may also use standard two soft light lighting.
The purpose of the following assignment is to learn about some of the best photographic portraits ever made.
The History of Photographic Portraits
The following assignment will help students become familiar with the history of photographic portraiture.
Assignment:
1. Go online and download portraits made by the following photographers.
2. Make a slideshow in Appleworks using the presentation tool that includes a few biographical sentences about each. Click the plus button several times to add slides.
Be sure to place the sentences at the beginning of each series of images and put the names of each photographic portrait artist above the sentence. Choose between 3 – 5 photographs from each artist. Compare your portraits with those of the masters. How are they alike? How are they different? Be sure to only select the portraits each artist made.
Photographers:
Richard Avedon
Annie Liebowitz
Arnold Newman
Dawoud Bey
Yousef Karsh
Alfred Eisenstadt
Gordon Parks
Paul Strand
Alfred Stieglitz
Edward Curtis
Irving Penn
Julie Margaret Cameron
Margaret Bourke-White
W. Eugene Smith
The purpose of these assignments is to learn to use the text tool in Photoshop and to learn how to manipulate images and backgrounds.
Photoshop Assignments:
We will now begin to use Photoshop to add text to our portraits. Everyone in class should by now have a portrait of themselves made by a fellow student in class.
- Double click on the Photoshop icon on your computer screen. Import your picture into Photoshop by going to FILE and then OPEN. Find your portrait on the server or computer desktop and open it.
- Click on the T or text button in the menu and select the textbook or T.
- Make a text box somewhere in your picture and type in a paragraph that tells us something about you. Be sure to put your name on top of the text. Look at the examples from above to get ideas. It may be a poem, a brief narrative, and anything else you want us to know about you.
Assignment:
You will now learn to use Photoshop to add a text box “T” to your self-portrait. See example below.
Working with text in Photoshop:
Select or have someone in class make a portrait of you. Using Photoshop, open the text box and place it somewhere in your picture. Select a font and color from the drop down menu and write your name in the text box. You may want to experiment a bit to see what kinds of title fonts and sizes work best.
Project idea: Go into Photoshop and select T and type in your name. Highlight it and explore using different fonts.
Watch Half Past Autumn. Write a one-page essay about the film that includes answers to the following questions:
- Who was Gordon Parks? Where was he born?
- What was his life like growing up? Was it hard?
- How did he become a photographer?
- Where did he make his most famous photographs? What did he like to take pictures of?
- What type of camera did he use? Was it a digital or a film camera?
- How did he become famous?
- How did racism affect him? What barriers did he overcome?
- Did he mostly photograph in color or in black and white?
MAKE AN IMAGE OF YOURSELF USING PHOTOSHOP
Create an image of yourself that shows a way you’d like to be but aren’t, or that shows a way you are that no one can see. Put yourself in a new environment: one that expresses these differences. There should be changes in both the image of yourself and the environment.
Use the techniques that we have gone over in class, but keep in mind that this is CREATIVE assignment: we will be talking about your work on the basis of what it communicates and how it makes us feel and think and only a little about the technology itself. The tools should be in the service of your idea. Be prepared to talk a little about your work. You should be able to articulate what you were thinking about when you made it.
If possible, think about how the digital tools themselves can help to communicate your idea--why are these the best tools for your piece?
MAKING A CLASSROOM PORTRAIT PHOTO BOOK
Now that you are familiar with making a portrait photography slideshow that includes text boxes in Appleworks, we will make a book of self-portraits in the classroom. View the following work of contemporary portrait photographer Dawood Bey and get ideas of how to combine text and photographs. You will be adding text to your self-portraits. (See the instructions following the presentation.)
CLASSROOM PORTRAIT BOOK PROJECT:
I would like to make a book about you and your friends in class. At this time you have seen many examples of good portraits. It is time to have someone in class make one of you. This time you will add text by writing a brief personal narrative using the Appleworks word processing program. I will publish these in a classroom book format.
1. Create a folder on your desktop and title it with your name plus the word “book”. Open Appleworks and select “new word processing”.
2. Write your name and something you would like us to know about you. Be sure to put your name on top of the text. Look at the example(s) above from the book “Classroom Pictures” by Dawood Bey to get ideas. You could write a poem, a brief narrative, or anything else you want us to know about you.
3. Have someone nearby read and comment on your writing. Edit it and save it inside the new desktop folder that you just made.
4. Have several portraits made of you by your friends in class and choose five of the best portraits of you and drag them into the same folder. With your help, I will select one for the classroom portrait book.
5. Save your folder onto the classroom server. Make sure to include the writing you did plus five jpeg files of the best portraits made of you.
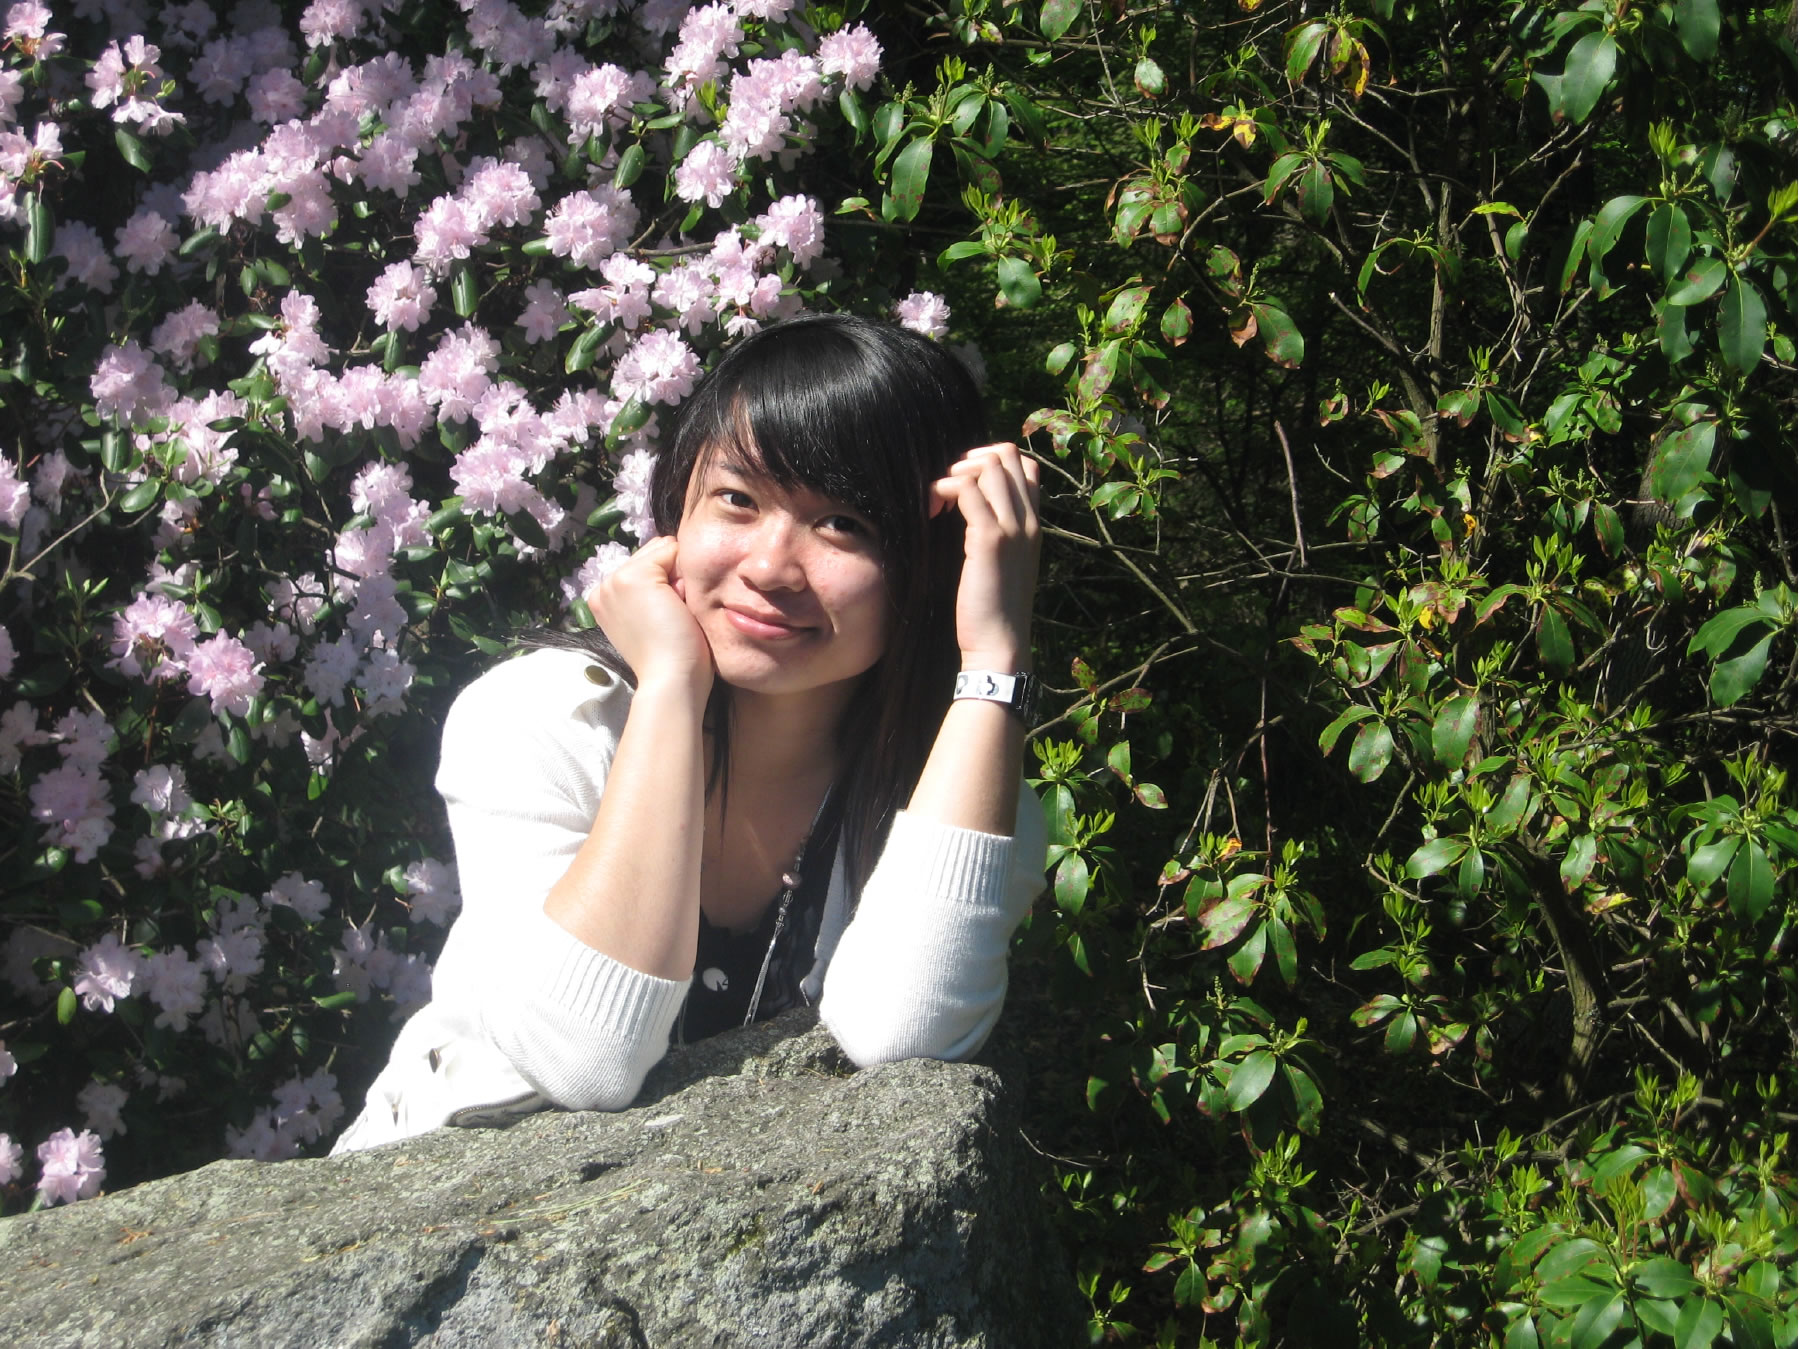
Rady Pheng
The world welcomes me in 1994
I traveled around Asia
Speaking two languages
Cambodian and English
At fifteen a freshman in NHS
At twelve I lost my dog, Lucky
People say I smile a lot
But I cry
People say I’m smart
But I try my hardest
At six I start school
At four I learn how to read
My fear is insects
I face many challenges
I’m not going to tell
No one goes through what I did
They’ll never know
I’m sad and depressed
I never show it
I’ve been separated
I’ve been broken hearted
I’ve been through death
I want to forget my childhood
Music is my life
I listen to music depending on my mood
I’ve made my parents proud
I’ve also made them disappointed
I might not be the perfect child
But I’m doing my best
I have dreams
But I don’t know where my goal is yet.
Additional project idea:
Photo Literacy: Using the Appleworks application program, select new word processing, and write an expressive piece that fits your mood/emotion portraits. It could be a poem that expresses a mood or point of view about issues and ideas. Make a folder on your desktop with your name and drag your writing into your desktop folder and save it on the server.
Look at the work of Rembrandt and Picasso online and make notes.
Go to a museum and look at portraits for extra credit. Write a brief description of what you saw.
Alternate plan:
We will now begin to use Photoshop to add text to our self-portraits. Everyone in class should by now have a portrait of themselves made by a fellow student in class.
6. Double click on the Photoshop icon on your computer screen. Import your picture into Photoshop by going to FILE and then OPEN. Find your portrait on the server or computer desktop and open it.
7. Click on the T or text button in the menu and select the textbook or T.
8. Make a text box somewhere in your picture and type in a paragraph that tells us something about you. Be sure to put your name on top of the text. Look at the examples from above to get ideas. It may be a poem, a brief narrative, and anything else you want us to know about you.
Graphic Design
Graphic designers create original designs, but unlike printmakers, they do not print their designs by hand. They combine type and pictures to create posters, signs, corporate logos or symbols, advertisements, magazines, and books. Most graphic designs are mass-produced on high-speed printing presses. Web designed pages are another form of graphic design. Look around you. What examples of graphic design can you find in your classroom?
Making a CD and Magazine Cover
Guiding Question:
What are the tools used to create and change digital photographs?
Content Objective(s):
The purpose of this assignment is to learn how to size, crop, copy and paste, transport, and add text to various familiar images. You will use your imagination to create interesting compositions.
Tools used:
The sizing tools.
The cropping tool.
The copy and past tools.
The free transport tool.
The text tool.
Vocabulary words:
Composition
Copy
Paste
Image
Text
Procedure:
- Double click on the Photoshop icon on the desktop dock of your computer.
- Look on the left-hand side and observe the variety of controls. We begin with learning how to create a new document, size your images, and create a CD and Magazine Cover.
- Under File, choose New and create a new blank image. The size of your images is determined by the pixels on your screen. Size the image by typing numbers in the pixels/inches dialogue box on the screen.
- In inches, choose 5 inches wide by 5 inches tall for a CD cover and 8 inches wide by 10 inches tall for a Magazine cover.
- Select 150 dots-per-inch in the box marked pixels.
- You may COPY AND PASTE an image from large size Google images or, if you want, photograph your friends, etc. to make your CD and Magazine covers.
- Add text by clicking on the TEXT box and typing. Have fun!
Make a new Photoshop document. Size it for 5 x 5 inches at 150 g dpi. Import your favorite photograph and add text. Below are some sample CD Covers. Make another one. Add these to your folder on the server.

MAGAZINE COVERS
Assignment:
Make a magazine cover. Open a blank document in Photoshop. Size the image to 8.5 x 11 inches. Add titles that you drag and drop into your workspace from the Internet if you like, or make titles with the Text tool yourself. You may add photographs from the Internet of from your own photo albums.

CD AND MAGAZINE COVER RUBRIC
|
Excellent |
Good |
Fair |
Poor |
Quality of your project idea |
|
|
|
|
Quality of your work assembling the CD or Magazine cover |
|
|
|
|
Understanding of Photoshop tools |
|
|
|
|
Quality of your final image |
|
|
|
|
ADVERTISING PHOTOGRAPHY
Create a new Photoshop document. Size it to 8 x 10 inches at 300 dpi by choosing Image and then image size. Shoot a product in the soft light display set up in the classroom. Import it into Photoshop and experiment with colors, curves, and filters. Add text to your display advertisement by clicking on the “T” or Text Tool and make a box in your document to insert text.
DOCUMENTARY PHOTOGRAPHY
PHOTOGRAPHING INSIDE FACTORIES, SCHOOLS, AND PRISONS
The Photographs of Michael Jacobson-Hardy
Lesson 1.
I will begin the first lesson by engaging students in a slide show presentation about my work photographing in factories, schools, and prisons. I will share my observations, ask for theirs, and engage them in a conversation about social class and race in the United States. I will help students see the connections between these social institutions and how they function within our economic system. I will use my work to help begin a discussion about race, social class, and economics as it relates to these institutions.
These children are doing this lesson because it is important for them to see how photography can be used to promote understanding of important issues. Photographs can be a powerful medium to bring about awareness and change.
A PowerPoint presentation will be used to engage students in the subject material of documentary photography.
Students will view the images and then begin to think about and discuss important issues regarding their immediate world around them.
Motivating Discussion: In lesson, I would like to show you a PowerPoint presentation of my work documenting conditions and people in factories, schools, and prisons. I will also lead you in a conversation about social class and race in the United States.
Let’s begin by viewing the pictures made in factories. Who works in a factory? What do you think of the conditions in these work places? What social class, ethnicity, and race are the workers who do this kind of work?
I will talk about the closing of the mills and factories and how the export of jobs overseas and down south has impacted workers here in New England.
I will then talk about how when jobs are lost and factories close, communities are hard pressed to raise enough money to fund public schools. The result is often a rise in the prison and jail population.
I will use my photographs to help you think about the big picture and how these social institutions are connected, especially as economic conditions worsen in this country. When jobs are scarce, there is a higher incidence of school dropout rates and as a consequence, we see a rise in the prison and jail populations.
How does poverty and race impact the society? Should we be putting our resources into building more and more prisons or into building more public schools?
Look at the final picture in the prison series. What do you think it is? Several students like you say it is a looks like a new mall, but in fact, it is the Hampden County House of Correction, a multi-million dollar prison in Ludlow.
Lesson 2.
The second lesson will introduce students to some of the work by contemporary documentary photographers as well as give them a historical perspective.
Students will be required to research online the works of several documentary photographers. We will study the origins and history of documentary photography from the pioneering work of Jacob Riis and Lewis Hine to the contemporary masters including Jerome Liebling, Diane Arbus, Robert Frank, Walker Evans, Dorothea Lange, Henri Cartier-Bresson and others.
Make Your Own PowerPoint Presentation
Students will be asked to go online and google the names of the following photographers and look a their work. They will choose one photographer to write about. They will be asked answer the following questions and make a PowerPoint Presentation of their work.
Students will learn about the history of social documentary photography by viewing the work of several important photographers.
Assignments:
DOCUMENTARY PHOTOGRAPHY SLIDESHOW
Study the work of the documentary photographers on pages 379 -381 in your classroom PHOTOGRAPHY textbook.
Go online and use the Google Image search engine to view the work of the following photographers.
Photographers to choose from:
Eugène Atget August Sander Jacob Riis Ben Shahn
Dorothea Lange Arthur Rothstein Walker Evans Henri Cartier-Bresson
Lewis W. Hine Russell Lee Marion Post Walcott
Gordon Parks Jerome Liebling Dianne Arbus Robert Frank
Open Appleworks and make a slide show that includes between 3 to 5 pictures from each photographer. Add captions that say something about the photographs and photographers you studied.
SAVE YOUR FILE WITH YOUR NAME PLUS THE WORD “DOCUMENT” TO THE DESKTOP AND IN YOUR FOLDER ON THE SERVER.
Documentary Photography
Assignment 2
Choose one documentary photographer to write a one-page essay about using Appleworks.
Answer the following questions:
Questions to answer on the opening slide:
1. Who was the photographer you chose to research online?
2. Tell us something about their life and work?
3. What was the principal issue they documented?
Add this to a slide show that includes examples of their work.
Photographers to choose from:
Eugène Atget August Sander Jacob Riis Ben Shahn
Dorothea Lange Arthur Rothstein Walker Evans Henri Cartier-Bresson
Lewis W. Hine Russell Lee Marion Post Walcott
Gordon Parks Jerome Liebling Dianne Arbus Robert Frank
Motivating Discussion:
The following list contains some of the most influential photographers that ever lived. Some help to begin this type of photography. Lewis Hine, the man who influenced my work the most, was known as the father of documentary photography (Google Lewis Hine).
Let me tell you a story. When I was just starting out as a serious photographer I showed a portfolio of my photographs to Hollister Sturges, then director of the Springfield Museum of Fine Arts. He told me he was doing a show of Lewis Hine’s early work and asked if I would like to exhibit my pictures made in New England Factories alongside his. What an honor it was for me to share this important exhibition. I noticed my last picture in the series was hanging next to a Picasso. It was at that moment that I decided I was an artist.
Go online and google the names of the following photographers and look a their work. Then choose one photographer to write about. After you have selected one documentary photographer to write about, make a PowerPoint presentation of their work. Be sure to include your name and the photographer’s name and your answer to the following questions.
Put your name plus this introductory information in your first slide, followed by a series of no less than five pictures made by the photographer you chose to study.
Questions to answer on the opening slide:
1. Who was the photographer you chose to research online?
2. Tell us something about their life and work?
3. What was the principal issue they documented?
Bibliography:
Books:
Photography, Barbara London and John Upton, Pearson Education, Prentice Hall, Pages 379-381
Factories, Schools, Prisons, Michael Jacobson-Hardy, Published by Holy Cross, 1996
Films to watch:
Born into Brothels
Watch:
Half Past Autumn, a film about the life and work of Gordon Parks.
Have students research and write a page about Gordon Parks and his work. What is significant about the man? What did he do? What did he accomplish? What were his major achievements?
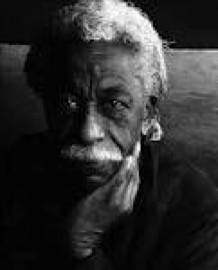
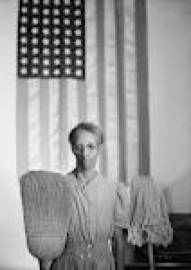
SOCIAL DOCUMENTARY PHOTOGRAPHY UNIT
Rationale: This unit will help students understand what documentary photography is. It will introduce them to contemporary work as well as give them a historical perspective. It will lay the foundation for them to make their own social documentaries.
Students will be required to research online and in books the works of several documentary photographers. We will study the origins and history of documentary photography from the pioneering work of Jacob Riis and Lewis Hine to the contemporary masters including Jerome Liebling, Paul Strand, Diane Arbus, Robert Frank, Walker Evans, Dorothea Lange, Henri Cartier-Bresson and others.
I will review the steps needed to initiate, conceptualize and produce a successful documentary project. For the final assignment, each student will choose a project to work on. Their work will be evaluated in periodic reviews. Students will share their work with others in the class as well. They will critique each other’s work.
Students will describe and analyze their own work and the work of others using appropriate visual arts vocabulary. When appropriate, students will connect their analysis to interpretation and evaluation.
Students will read the section on documentary photography in our classroom textbook. They will answer a series of questions related to the text that includes an overview of the contributions of several social documentary photographers. Students will also go online and will be required to write a one-page summary of the work of a photographer they choose from a list of social documentary photographers. Special emphasis will be on the ability of documentary photography to bring about social change.
I will begin by showing the following work by Milton Rogovin to engage students in the art of documentary photography. I believe that his portraits made of the same people over time are compelling and would make for a good presentation and would engage young people in the subject of documentary photography.
First Lesson -Motivating Discussion:
The following lesson will begin a unit about social documentary photography. I would like to begin by showing you some of the work of Milton Rogovin. He photographed people in his neighborhood in Buffalo, New York and returned several times to re-take pictures as his subjects got older. Look at the following pictures. Can you see a resemblance in each pair of images? Notice how people age over time.
Milton Rogovin Diptics
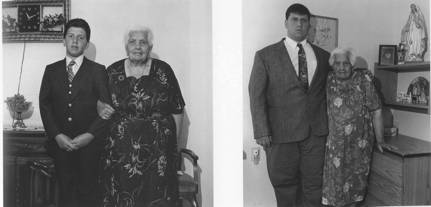
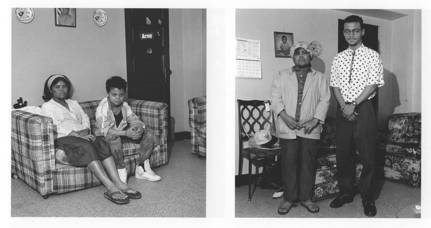
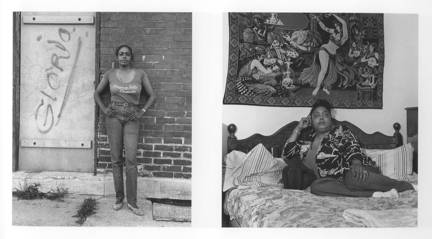
I would like to show you a PowerPoint presentation of my “Factory, School, Prison” series of photographs and talk about my work and some of the issues raised by the images.
After I am done with my presentation, and if there is enough time,
you will be asked to study the work of several documentary photographers and choose one to research further on pages 379-381 in our classroom textbook titled PHOTOGRAPHY and answer the following questions:
(5.9)
Documentary Photography
Go online and Google the names of the following photographers and look a their work. Choose one to write about and answer the following questions.
Photographers to choose from:
Eugène Atget August Sander Jacob Riis Ben Shahn
Dorothea Lange Arthur Rothstein Walker Evans
Lewis W. Hine Russell Lee Marion Post Walcott
Gordon Parks Jerome Liebling Dianne Arbus
Now you will make a slideshow using Appleworks or Microsoft Word about the photographer you selected from the above list and add text from your research. Be sure to go online and look at their work and write a one-page essay including the following questions.
1. Who was the photographer you chose to research and what did they do?
2. Was their work successful in bringing about change or did it simply serve to bring about public awareness about a certain issue?
3. What was the principal issue they documented?
4. Tell us something about their life and work?
ARCHITECTURAL PHOTOGRAPHY
TAKE PICTURES OF NORTHAMPTON HIGH SCHOOL from various viewpoints. Notice the effect of converging lines when your camera looks up at the top of the building. Compare this to looking straight on. What happens when you tilt the camera to the side?
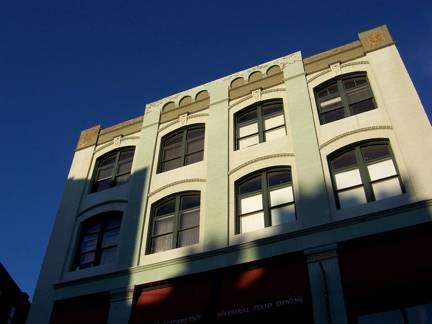
WALK ALONG ELM STREET AND TAKE PICTURES OF NORTHAMPTON HIGH SCHOOL, THE CHURCH NEXT DOOR, AND NEARBY HOMES. DO NOT GO ONTO PRIVATE PROPERTY.
Composition and Perspective:
Notice the geometry of each building. Try holding the camera parallel to the structure so that the lines do not converge. Try deliberately pointing the camera up so that parallel lines do converge. How you hold the camera will affect the shape of the objects you capture. Notice perspective—how lines converge or recede into the distance. Remember that composition is about geometry and the placement of objects and people in the frame of your camera. Return to class and upload your pictures in iPhoto. Experiment with editing in color and black and white and sepia. Try changing contrast and brightness. Remember to save your pictures to your folder on the classroom server when you are finished editing them.
Make a new folder on your desktop. Title it with your name plus the word final. Select 20 of your best photographs from the semester and put these jpeg files into the folder. Make a slideshow in iPhoto and go to File, then choose Export and save it on the desktop as a Quicktime movie file. Put your movie into your final folder and drag your final folder to the classroom server.
FINAL PORTFOLIO
1. Make a folder on your desktop. Label it with your name plus the word “final”
2. Put your CD cover in it.
3. Put your Magazine cover inside it.
4. Put your “Documentary Photographers” slide show in it.
5. Finally drag it into your server folder and test that all files open on the server.
PORTFOLIO
1. Make a folder on your desktop. Label it with your name.
2. Put some of your best landscape pictures in it.
3. Put your Poster Image inside it.
4. Put your “Documentary Photographers” slide show in it.
5. Finally drag it into your server folder and test that all files open on the server.
Looking at one’s work on display and discussing the results with classmates and teacher are important parts of the art experience. An evaluation does not mean criticism. Rather, it means looking at artwork with a critical eye. It means being able to identify what is working well and what needs improvement. It is important for all students to come away from evaluations feeling positive about some aspect of their work. For this reason, it is best to abide by the rule that comments about any work of art must be positive and helpful. Evaluations should also help students decide where to proceed at any given point. Evaluations may focus on the techniques, design, style of working or emotional impact of the work.
Remember, the teacher evaluating a picture must remain positive at all times. Find something that you like about your student’s work and say what it is. Give positive feedback at all times. Even the most simple attempt at making art is worth rewarding with praise. Students will want to continue to make work if the teachers expresses genuine enthusiasm in their work. You can never praise them too much!
Following are instructions for making an exhibit of your student’s work. These come after you and your students have met to narrow down their best work.
Instructions for making an exhibition
Select two or three of you favorite photographs made so far. I will make a folder on the server marked Exhibition. Drag your choices into the Exhibition server folder. I will make a selection of these to help you print for the exhibition.
I need five people to volunteer to create the first exhibition panel. The panel will be made on 30 x 40-inch matt board. Photographs will be mounted with four sticky pads supplied by me. At least some members of your group should be good at math and will be responsible for laying out nine photographs on the mounting board, Do this in three rows with three pictures in a row.
This is a good example of using math to solve a problem. Divide the board in three sections. Mark the placement of each photo with light pencil markings at the four corners of the 8 x 10–inch photographs. Have the horizontal images all on one panel and the vertical ones on another.
Call me over when you have finished laying the 9 pictures out and I will supply you with sticky pads to mount them to the exhibition boards.
Forbes Library Art Gallery Exhibit
Student Art Work:
NHS Photo/Literacy Project Exhibit held at the
Northampton Education Foundation Annual Awards Banquet
PHOTOGRAPHY FEEDBACK FORM
NAME_________________________
Use the front and back of this form to write a summary of what you learned this semester. The more detail you give, the better.
How do you think this course will make a difference in your future pursuits?
What other aspects of photography would you like to learn about?
What was the best part of the course?
What did you like the most?
What did you like the least?
What did you learn about yourself in terms of your own creativity?
What grade would you give yourself for creativity?
What grade would you give yourself for mastery of technique?
What grade would you give yourself for effort and initiative?
Fill out this sheet (you may use the back to answer questions) and hand it in. Be sure to answer all questions.
Resources:
http://photo.tutsplus.com/articles/round-ups/100-helpful-photography-tutorials-for-beginners-and-professionals/
http://thingsorganizedneatly.tumblr.com/archive
http://www.boston.com/bigpicture/
Michael Jacobson-Hardy is author of several books including: Behind the Razor Wire: Portrait of a Contemporary American Prison System, (New York University Press), 1999; The Changing Landscape of Labor: American Workers and Workplaces, (University of Massachusetts Press), 1996; and Facing Education: Portraits of Holyoke School Children, 1993. His work has been exhibited widely and is in the permanent collections of the Smithsonian Institution, the Yale University Art Gallery, the Addison Gallery of American Art, the Smith College Museum of Art, the Whitney Museum of American Art, the Corcoran Gallery of Art, and the Fogg Art Museum at Harvard University. He currently teaches photography and audio/video production at Northampton High School.
How to make your own photo essay blog:
http://farmingforjustice.wordpress.com/
RESOURCES:
http://www.photographymad.com/pages/view/10-top-photography-composition-rules
http://www.photographymad.com/pages/view/understanding-and-using-negative-space-in-photography
http://www.photographymad.com/pages/view/close-up-photography
http://www.photographymad.com/pages/view/sports-event-photography-tips
http://www.photographymad.com/pages/view/silhouette-photography
http://www.photographymad.com/pages/view/the-secrets-of-stunning-waterfall-photography
http://www.photographymad.com/pages/view/guide-to-architectural-photography
http://www.photographymad.com/pages/view/10-ways-to-digitally-improve-your-photos
http://www.photographymad.com/pages/view/how-to-hold-a-monopod
http://www.photographymad.com/pages/view/the-red-eye-effect-what-it-is-avoiding-it-and-removing-it
http://www.photographymad.com/pages/view/flower-photography
http://www.photographymad.com/pages/view/landscape-photography-tips