Panopto Recording Basics (Windows)

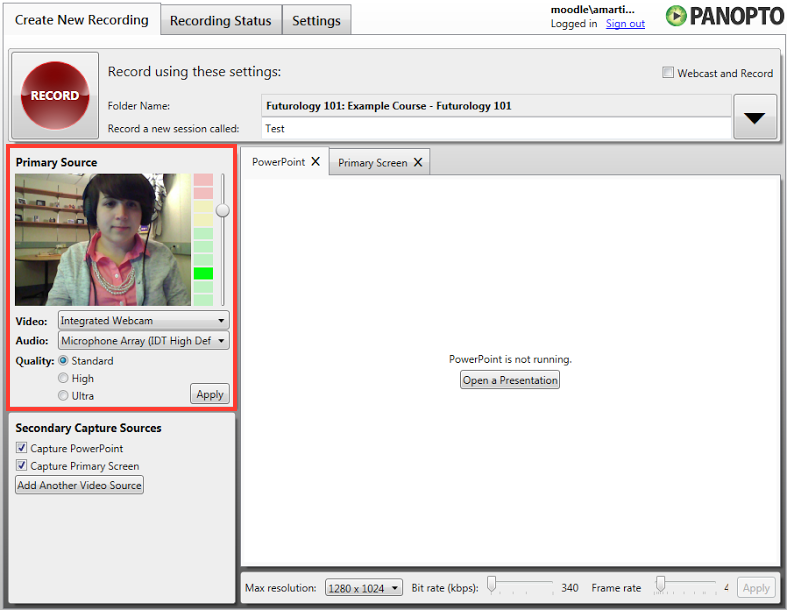
Recording with Panopto is simple. You can record your screen, webcam, slideshow, and voice at the same time. When you’re done recording, the video is automatically uploaded to the Panopto server and made available to students through Moodle. Before recording a Panopto video, be sure to add and configure the Panopto block in your Moodle course and log in to Panopto.

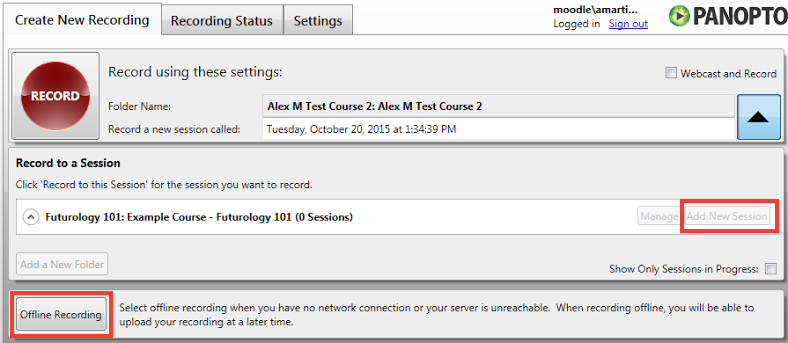
When beginning a new recording, first choose which course the video should be uploaded to and which sources you would like included in the video:

1

To select an online course folder to record to or to create an offline recording to be uploaded at a later date, in the upper right of the Panopto Recorder window, click the more button (unnamed-2).

  • To record to a course folder, to the right of the folder name, click Add New Session.
  • To create an offline recording, at the bottom of the window, click Offline Recording.

folder-chooser (1)The Upload Settings window will close.

2

At the top of the Panopto Recorder window, in the “Record a new session called” field, provide a name for your recording.
Note: Students will use this name to locate the video, so be certain it is something informative and clear.

3

In the Primary Source section at the left side of the window, choose Video and Audio sources and set the Quality level.

  • Check that you can see the video input in the Video Preview window
  • Confirm that the audio input is working by making some noise and checking that the bar to the right of the webcam preview reacts. Drag the slider to adjust the level if the bar turns yellow or red.
  • Ultra is the only quality level that produces HD video. This will result in large file sizes and slower streaming. Standard is sufficient quality for most recordings.
4

In the Secondary Capture Sources section, select Capture PowerPoint to record slides in your video.

  1. In the upper middle of the window, click the PowerPoint tab.
  2. Click Open a Presentation to navigate to a saved PowerPoint file on your computer. The Begin Recording window will open.
  3. To open your slideshow in Presenter mode and begin recording now, click Yes. To establish other settings and begin recording later, click No. The Being Recording window will close.
  4. To begin your slideshow in presentation mode when recording starts, in the PowerPoint tab, select Start presenting when recording starts.

unnamed-3

5

Click Capture Primary Screen to record your computer screen in your video.
Note: You will not see a preview of your computer screen in the Primary Screen tab, but it will still be captured.

6

To add additional sources such as an external camera or document camera, click Add Another Video Source.

7

To begin recording, at the upper left of the Panopto Recorder window, click Record. Recording will begin and a timer will appear in the upper left of the window.

unnamed

8

At any time, click Pause to stop recording. Any content recorded while paused will be cut from the video, but can be recovered in the editor.

9

When your recording is complete, in the upper left of the window, click Stop. The Recording Status tab will open. Your recording begin uploading to the Panopto server and processing. When complete, the video will be available to students on Moodle.

To prevent a video from becoming available to students or to set an availability range, see Panopto’s Availability page. For help editing a video, see Panopto’s Basic Editing guide.


We'd love your feedback!

Last modified: July 26, 2016